Category: Part 3 Portrait and Figure

More drawings from Life Drawing Group

Below are some more of my drawings and some quick sketches from the weekly Life drawing group that I attend in Ely.

The drawings are in chronological order with a brief commentary.
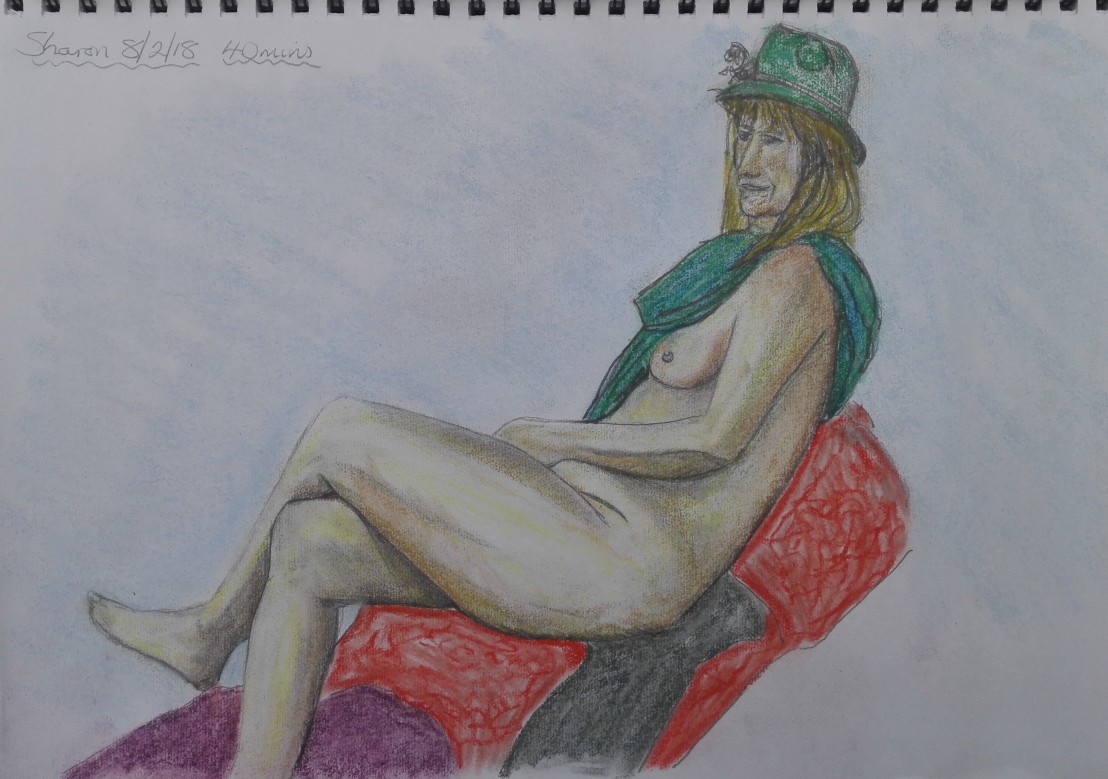
Sharon 8/2/18

I decided to use some chalk pastels to add a bit of colour. The head looks a little small compared to the left thigh.
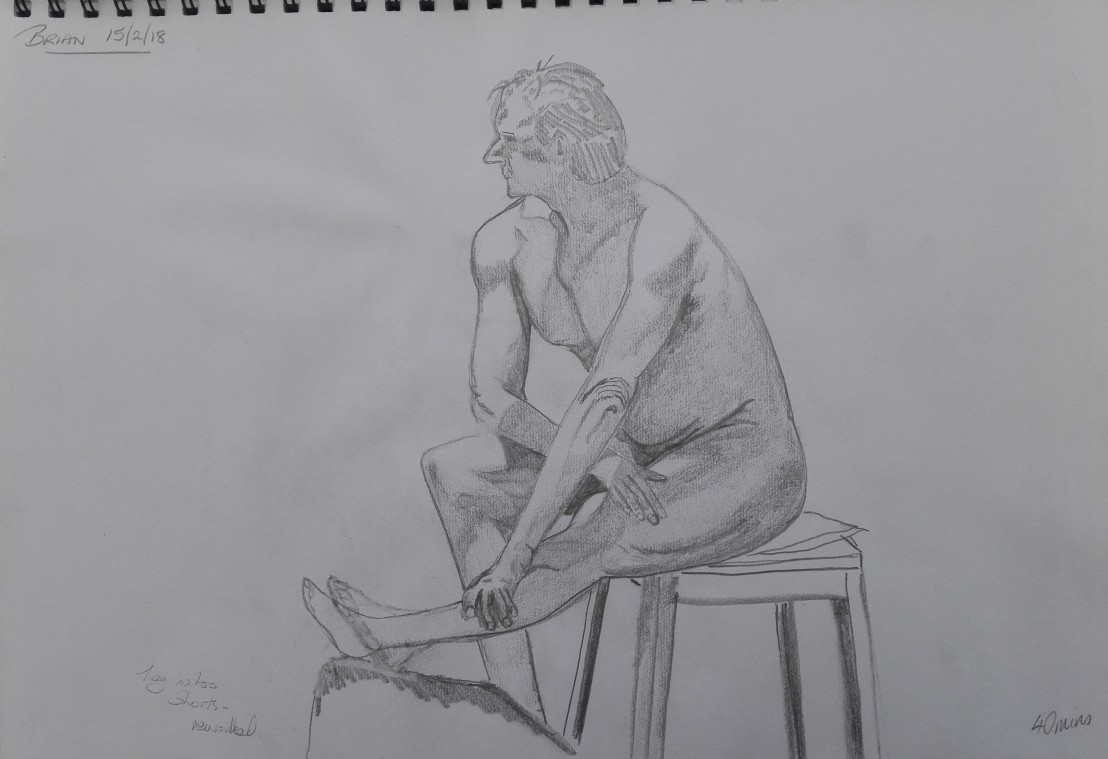
Life Drawing 8-2-18 Sharon

Brian 15/2/18

Two sketches of Brain. I like the way I have caught the pose in the first and in the again the pose is well described. The second sketch suffers from the left leg being too short.
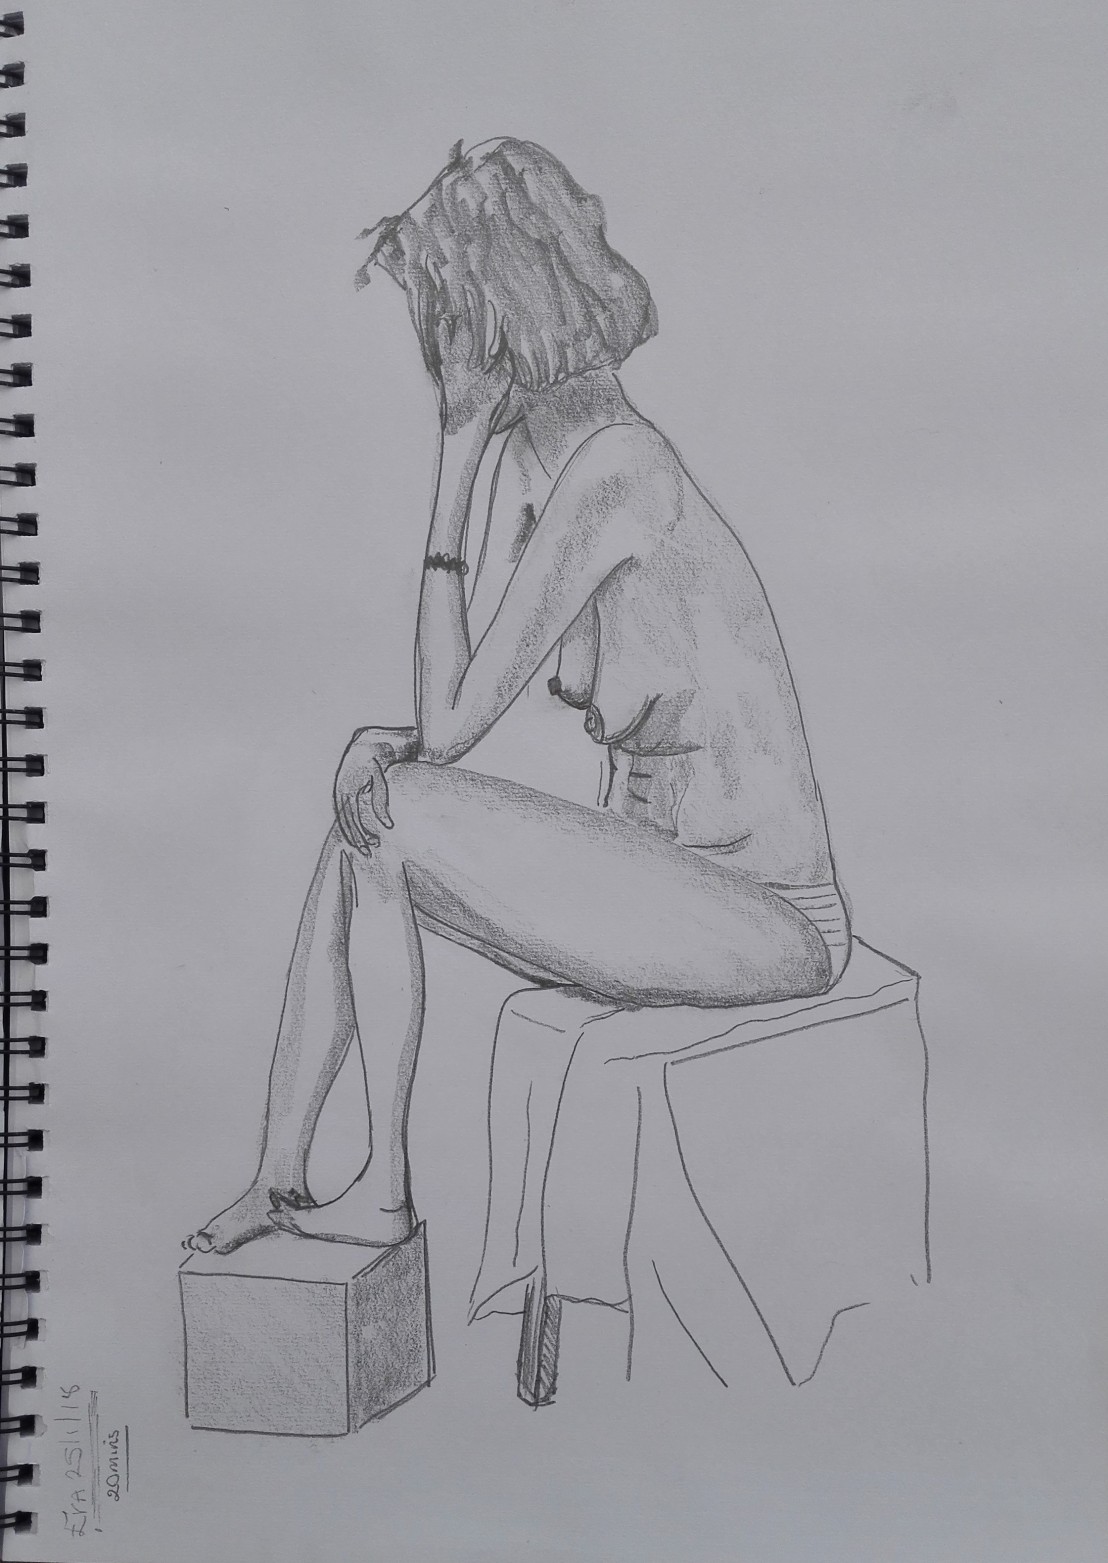
Life Drawing 15-2-18 Brian 1

Life Drawing 15-2-18 Brian 2

Eva 22/2/18

Pose interesting and drawing proportionally correct

Life drawing 22-2-18 Eva

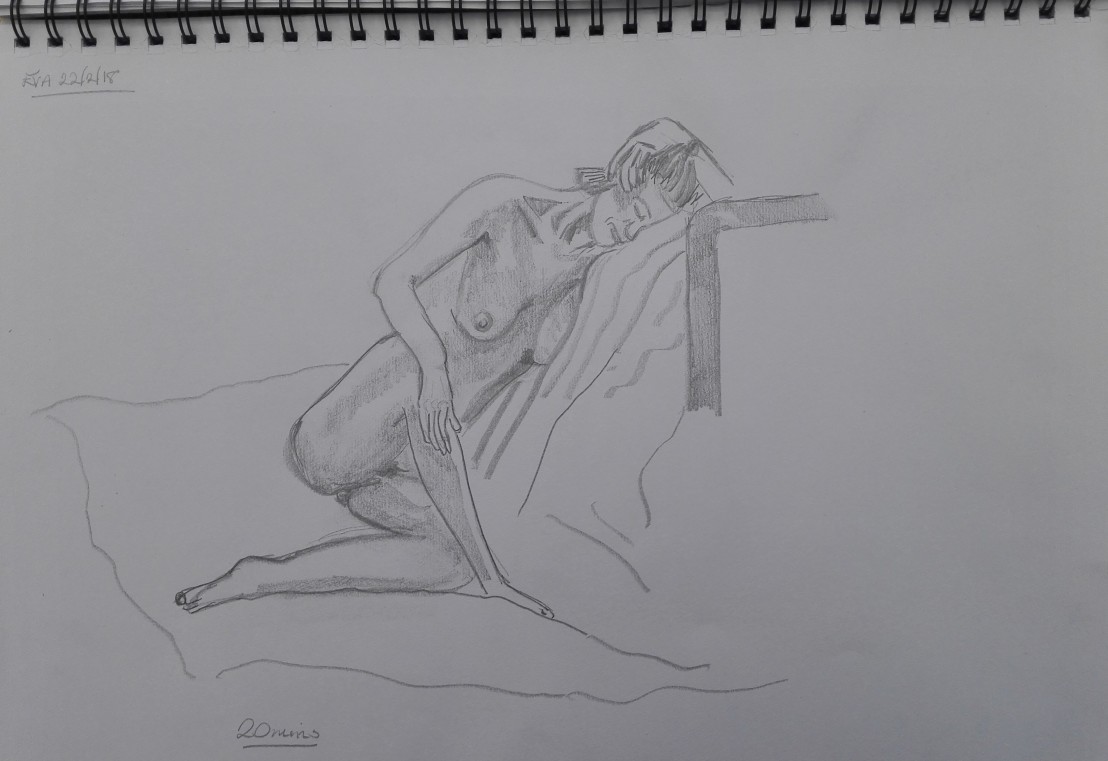
A further attempt at using chalk pastels. I struggled to get the foreshortening on the leg.
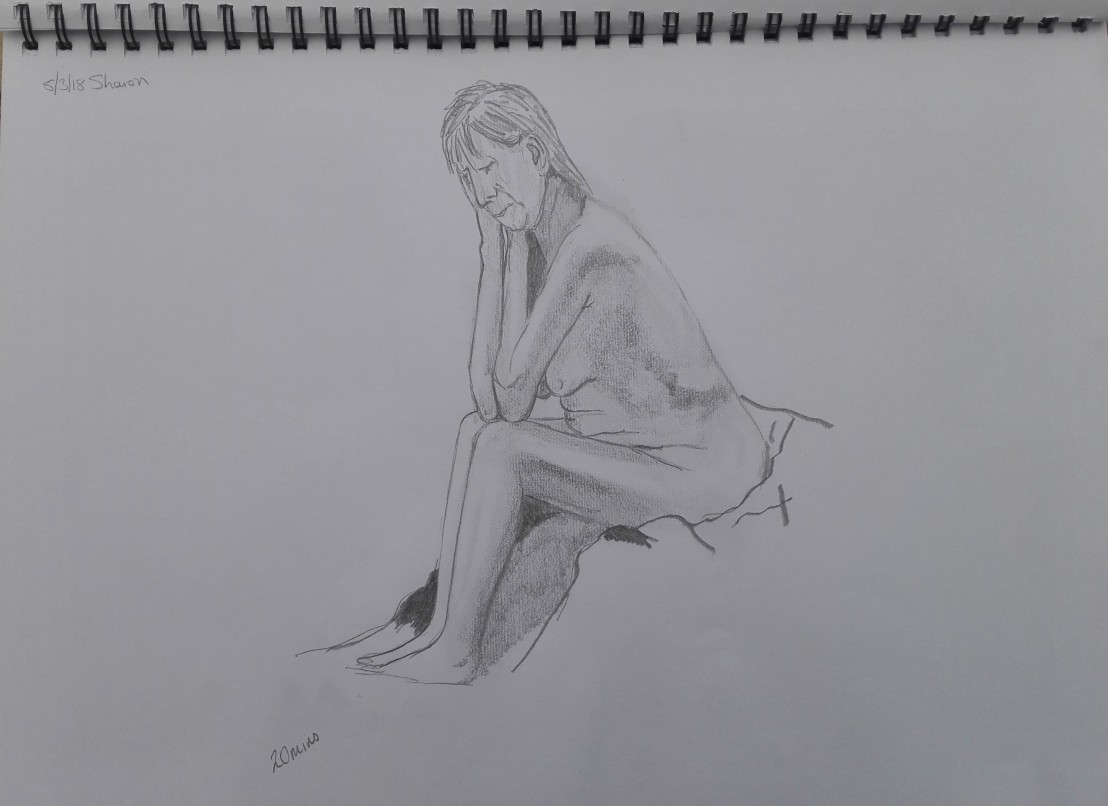
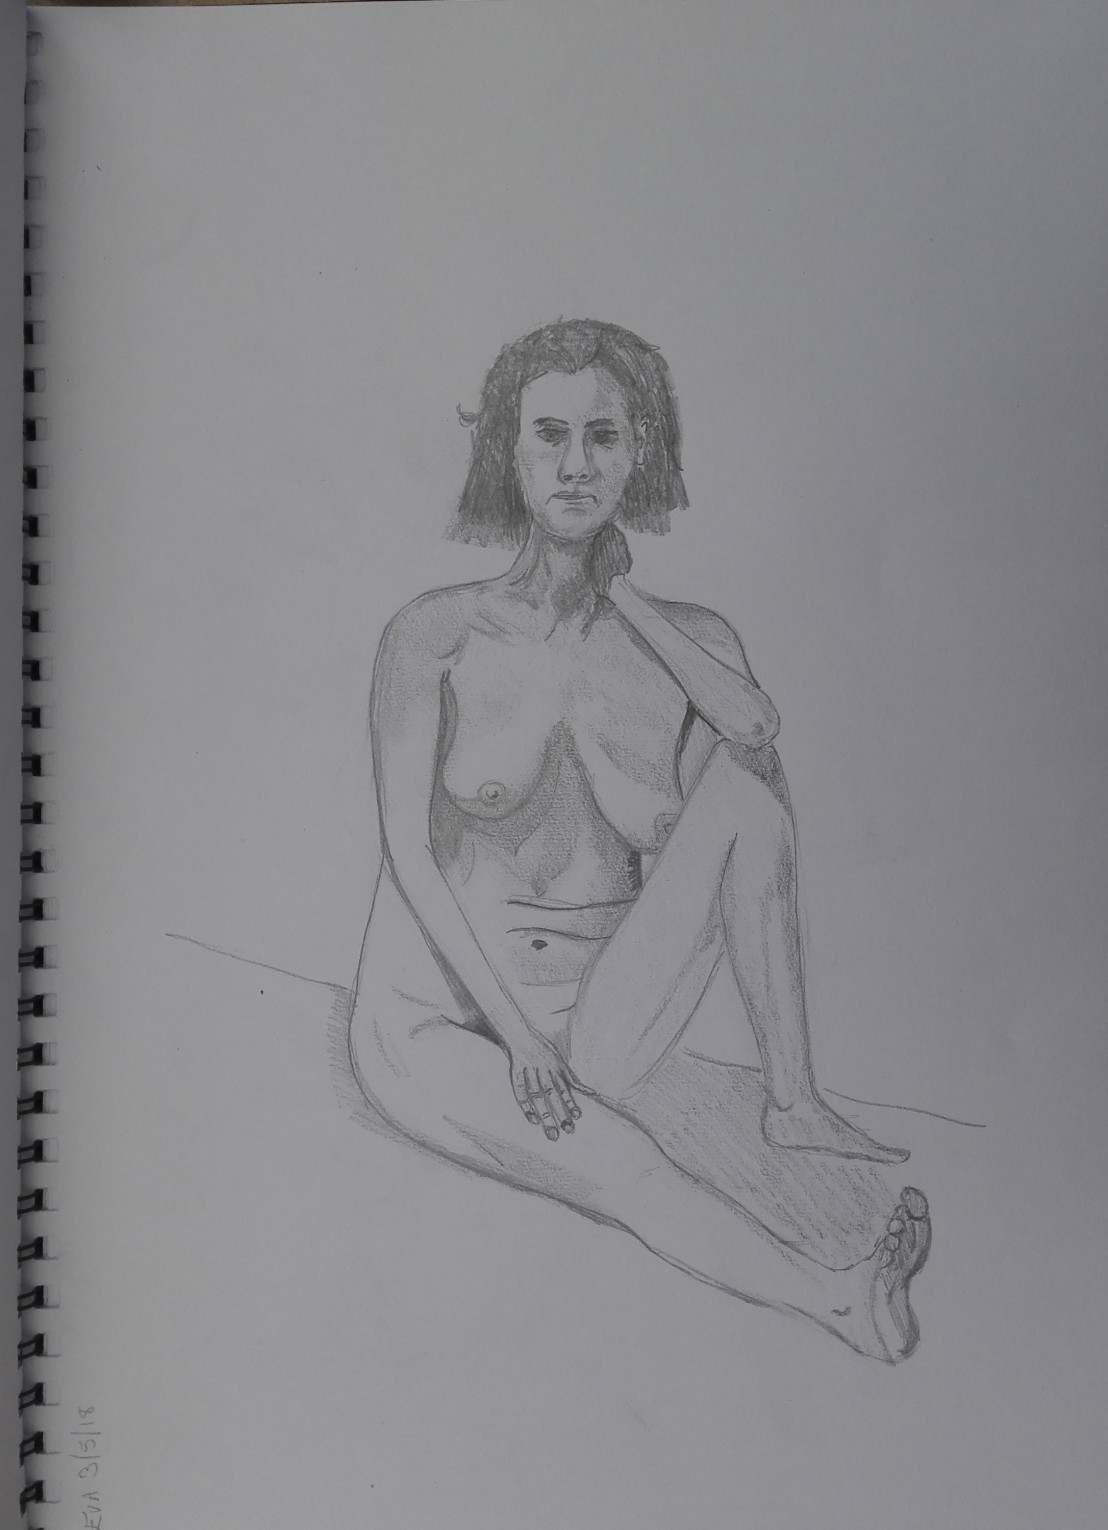
Life Drawing 22-2-18 Eva 2

Sharon 8/3/18

Proportions about right, could have done with more time to improve the face and hair.

Life Drawing 8-3-18 Sharon 1

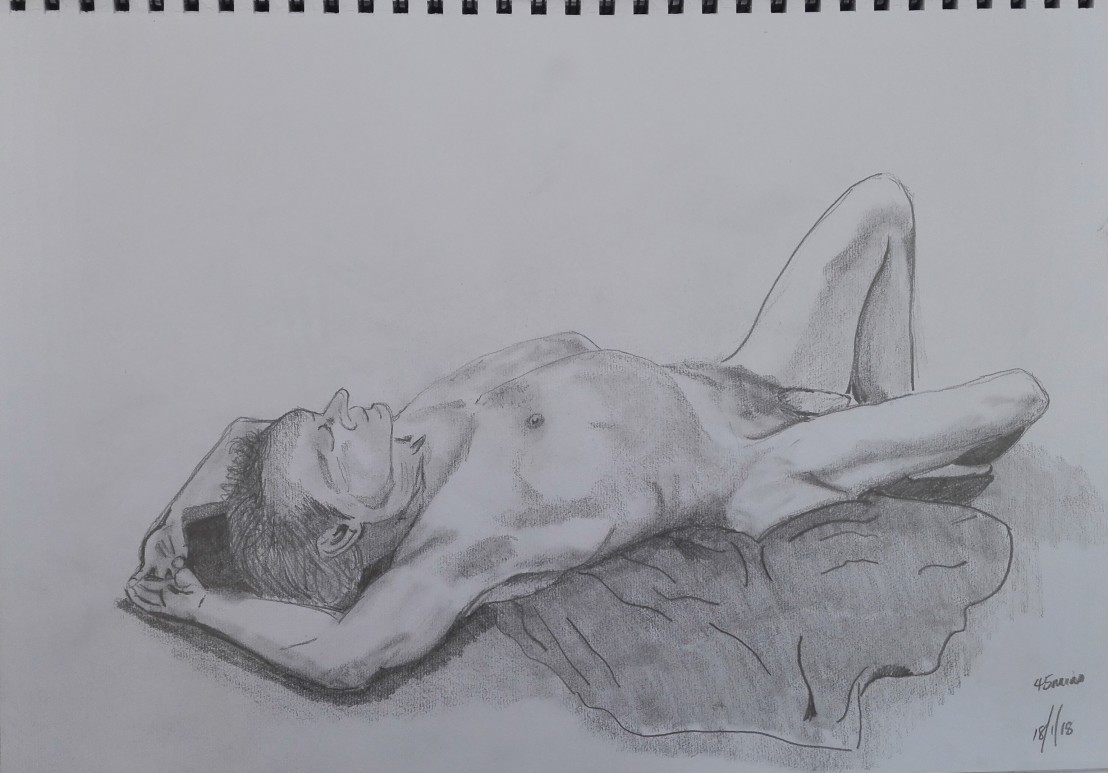
The foreshortening on the thighs was the challenge in this sketch. I’m reasonably happy with how I captured them.

Life Drawing 8-3-18 Sharon 2

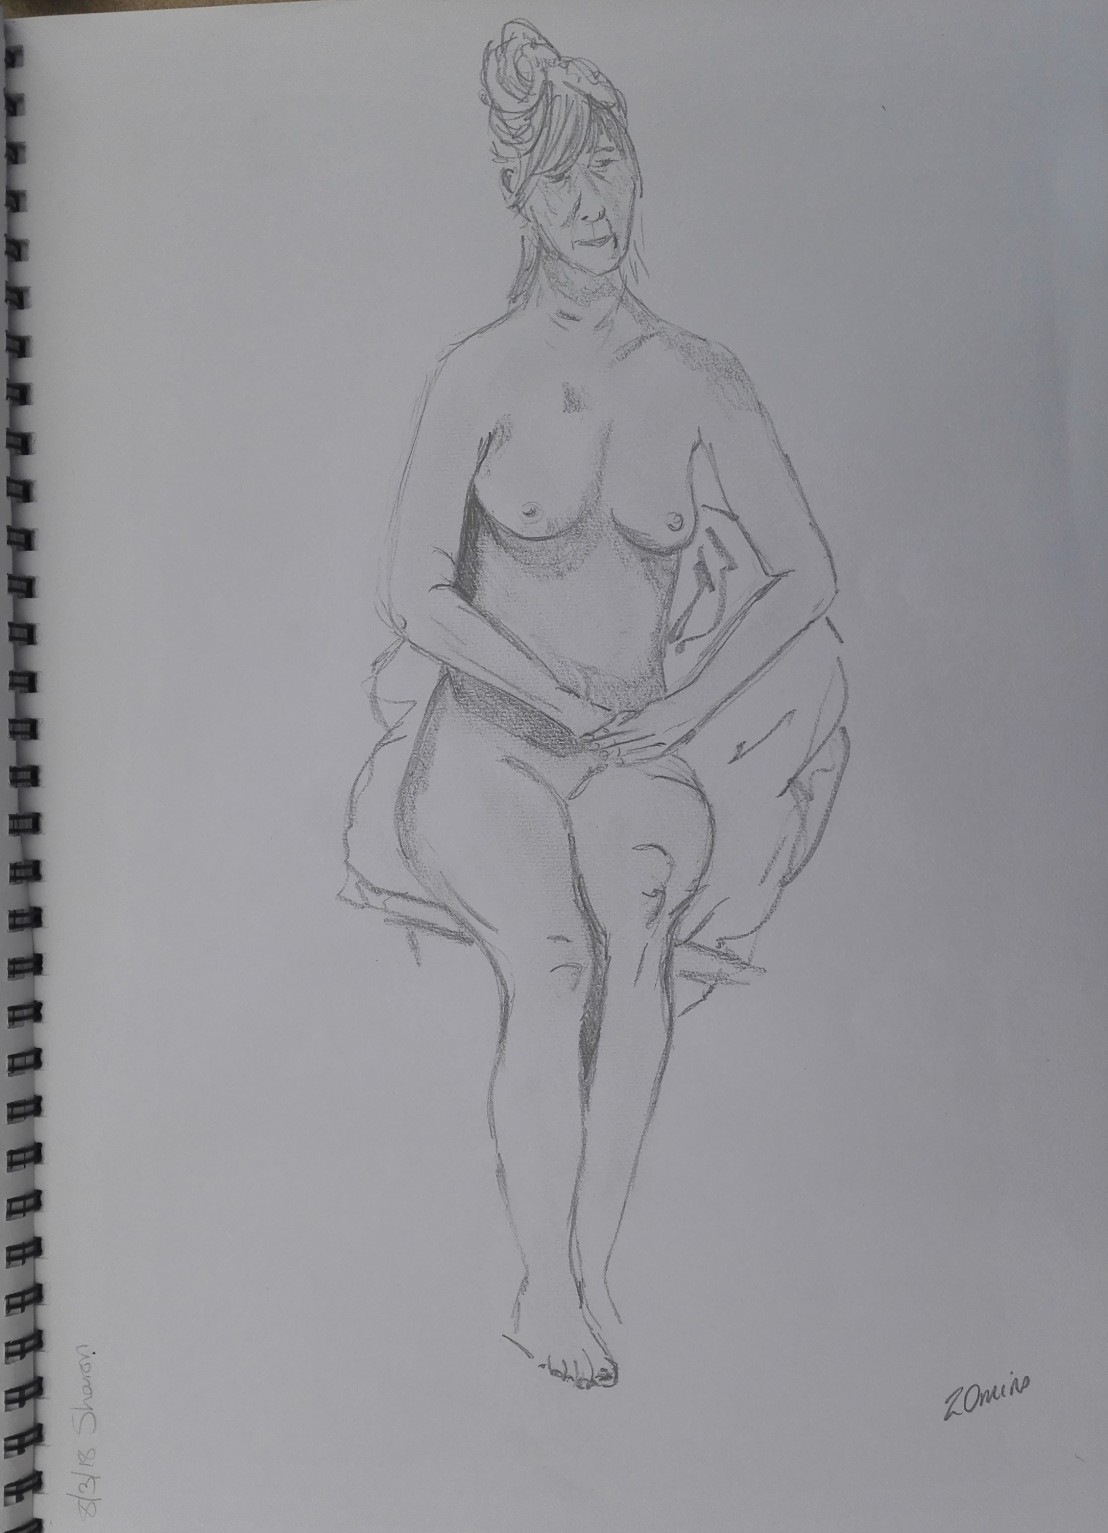
This pose suggests an elegance that is perhaps flattering.
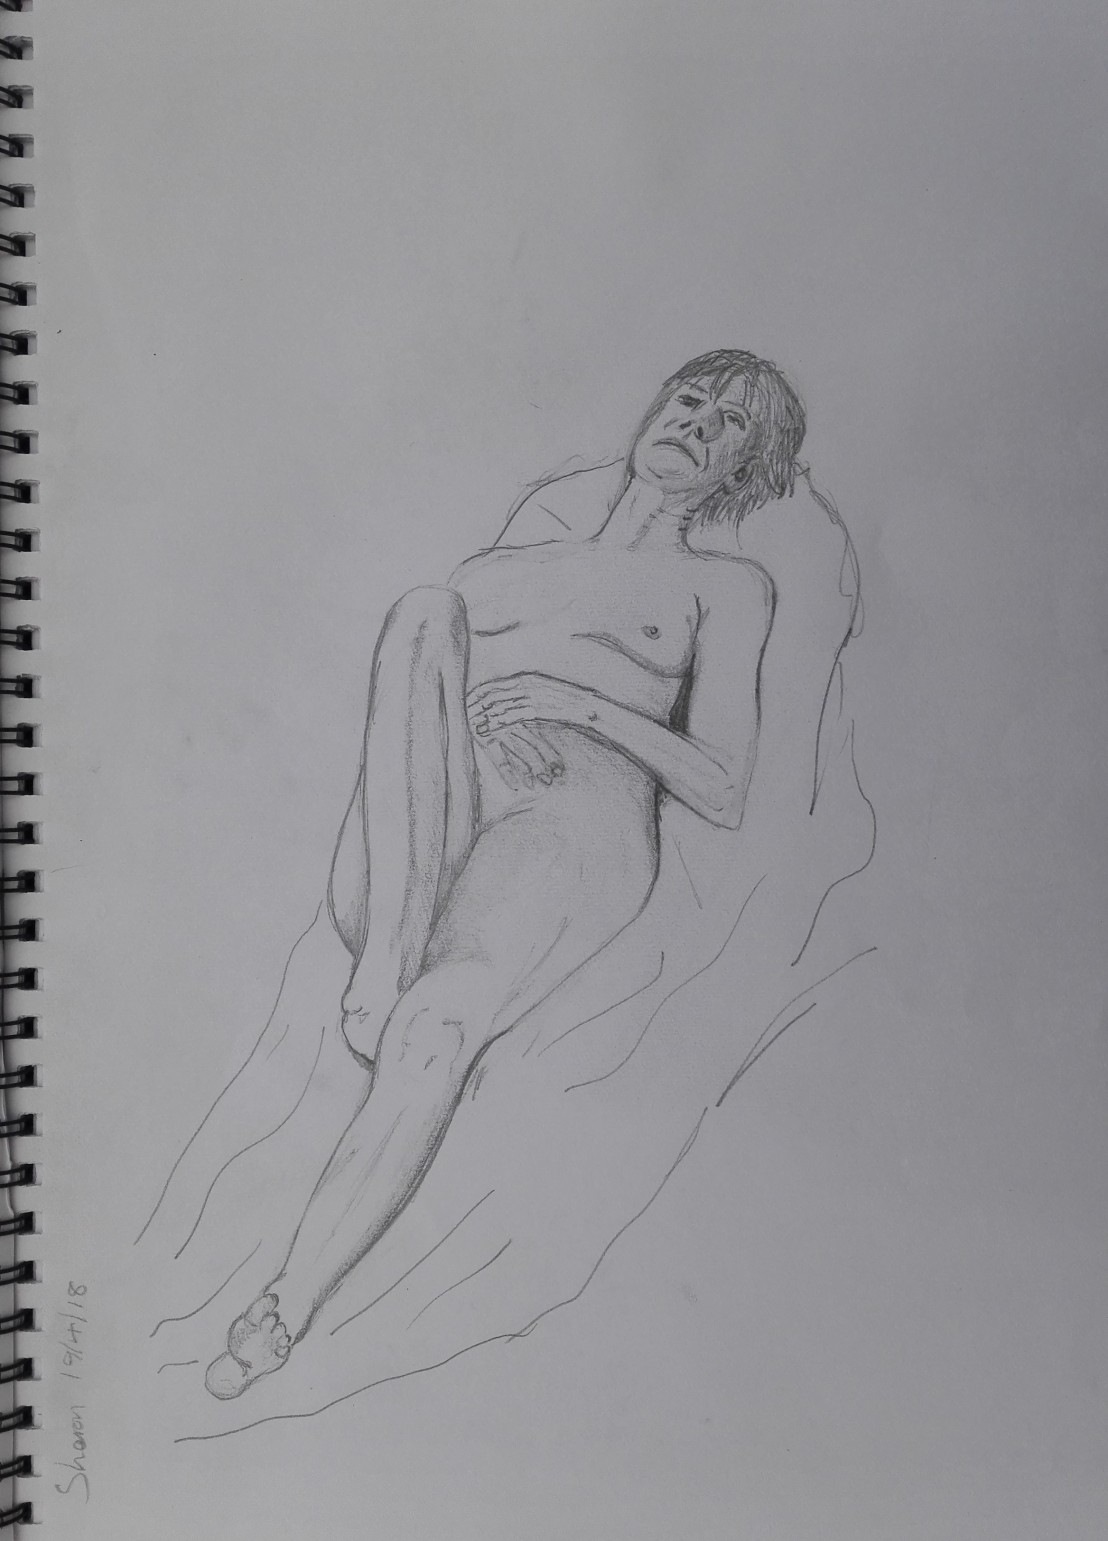
Life Drawing 8-3-18 Sharon 3

Sharon 19/4/18

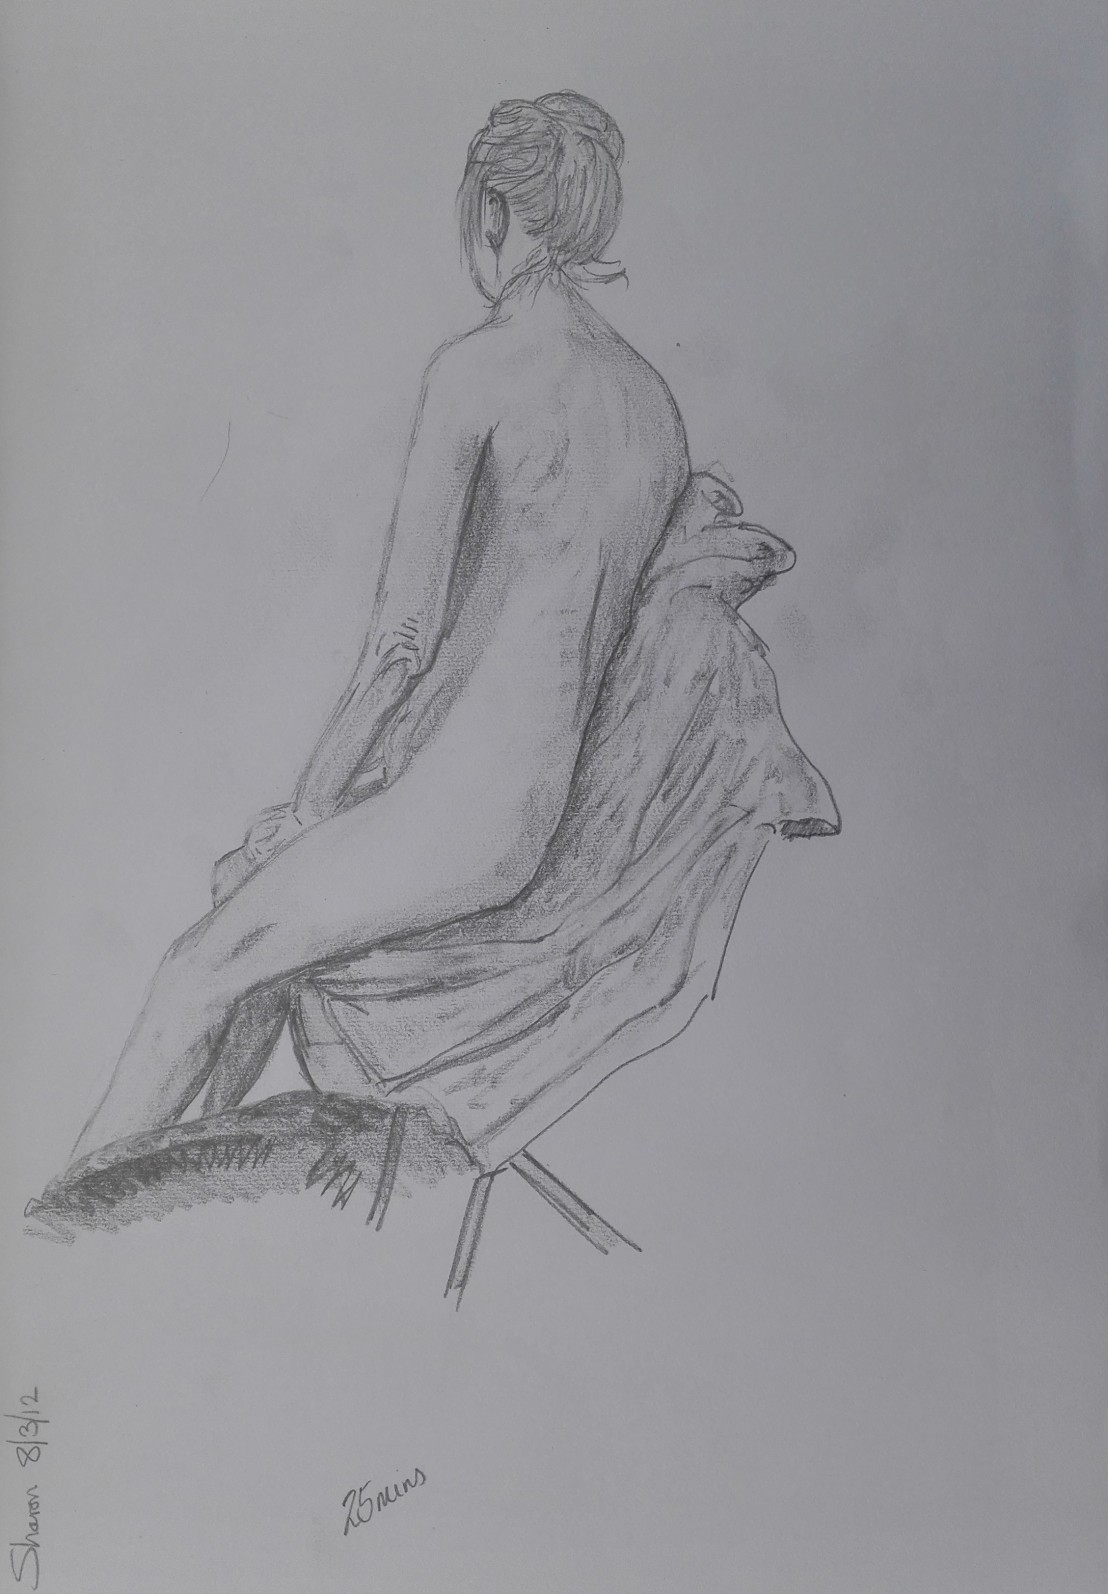
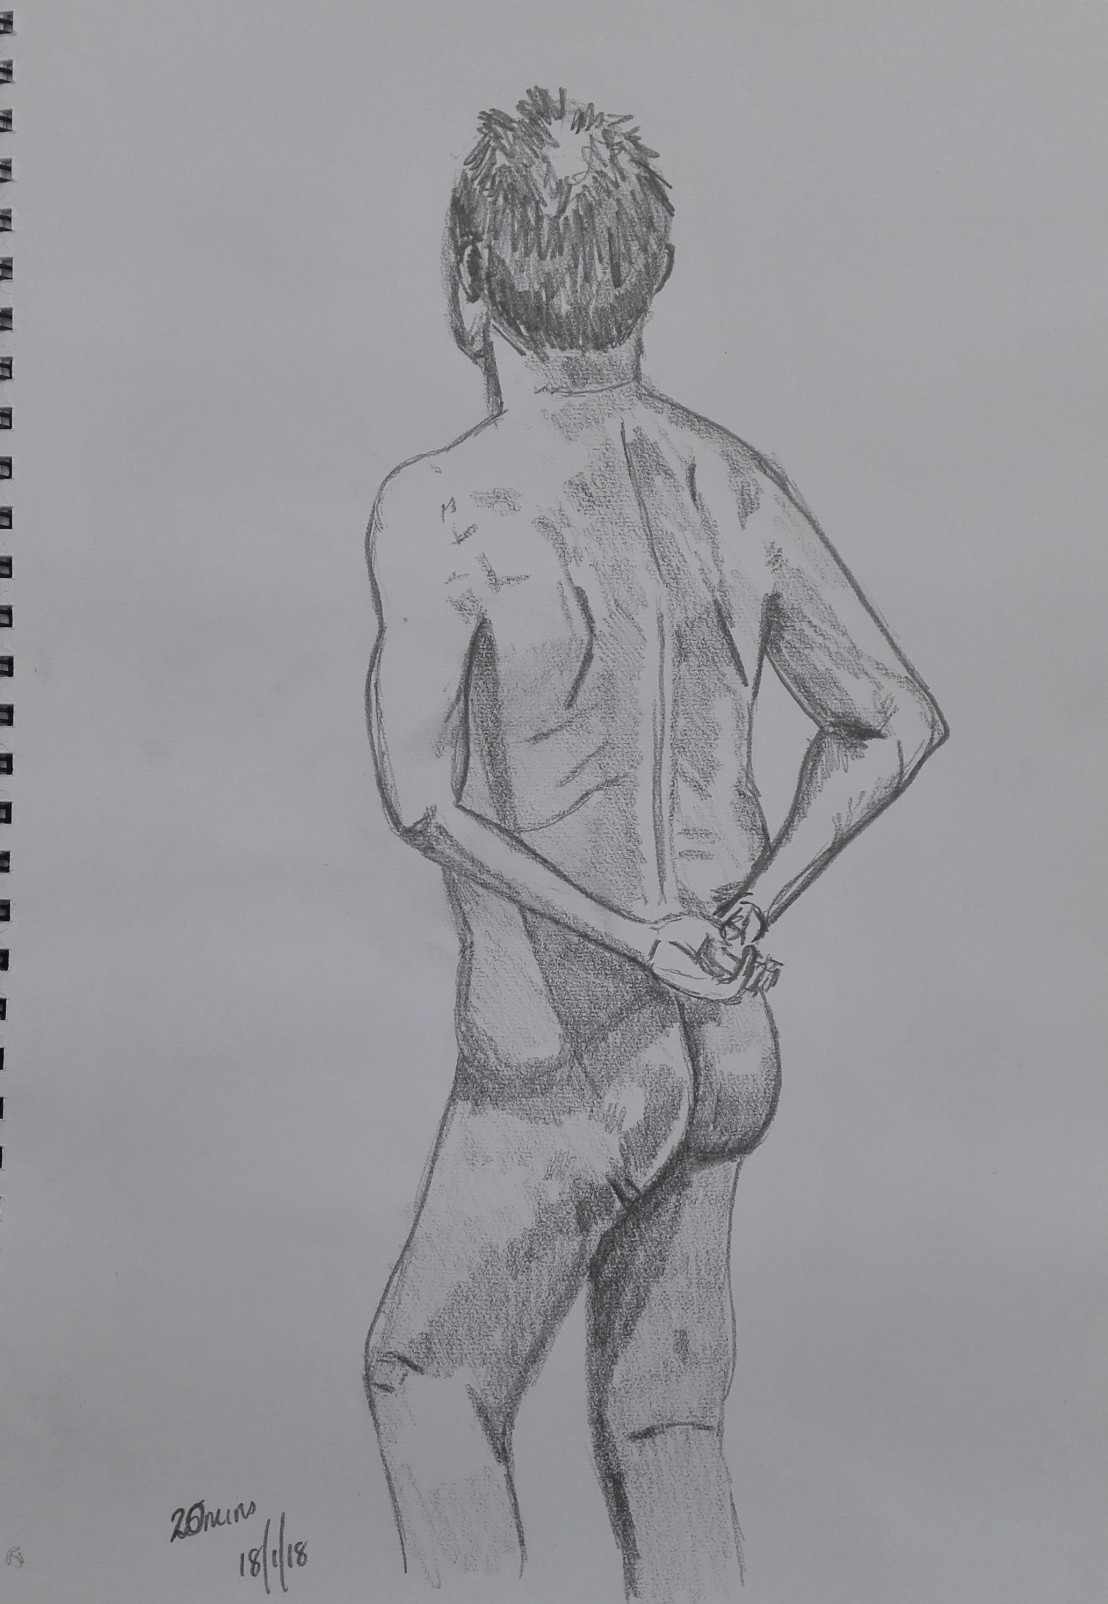
I find rear views interesting and challenging as there are an absence of strong features and therefore the tonal qualities become more important.

Life Drawing 19-4-18 Sharon 1

The overall foreshortening and the angle of the raised leg provided the challenges in this sketch.
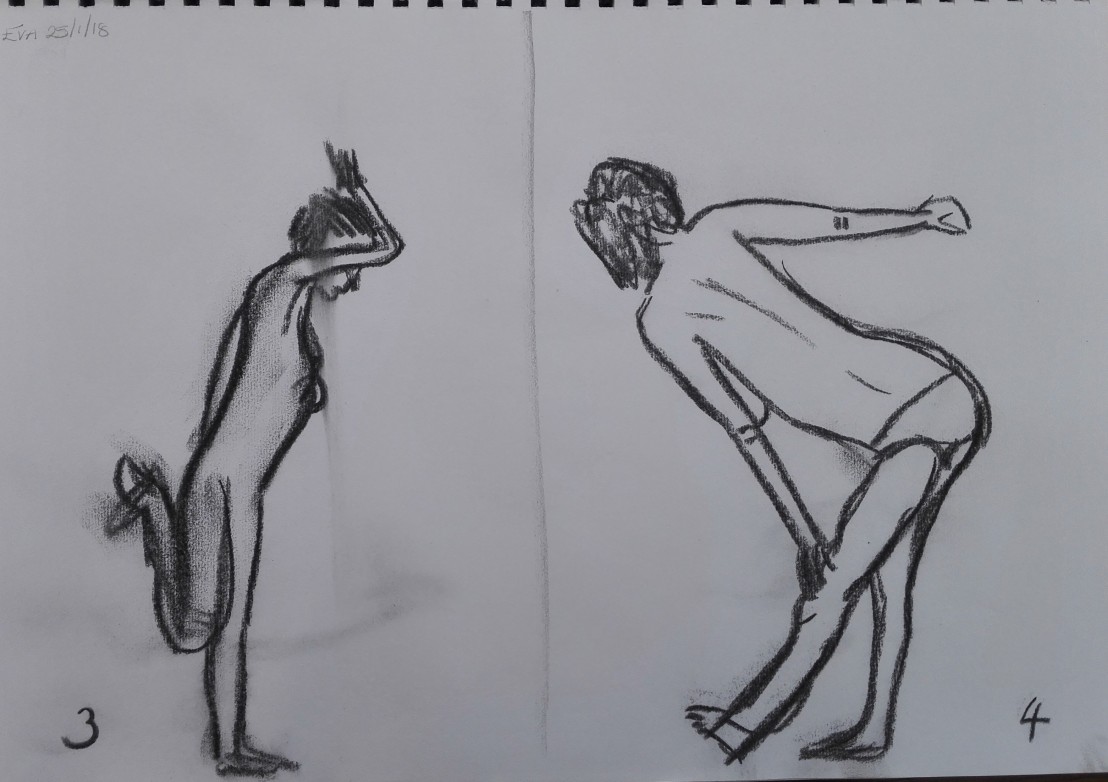
Life Drawing 19-4-18 Sharon 2

Eva 3/5/18

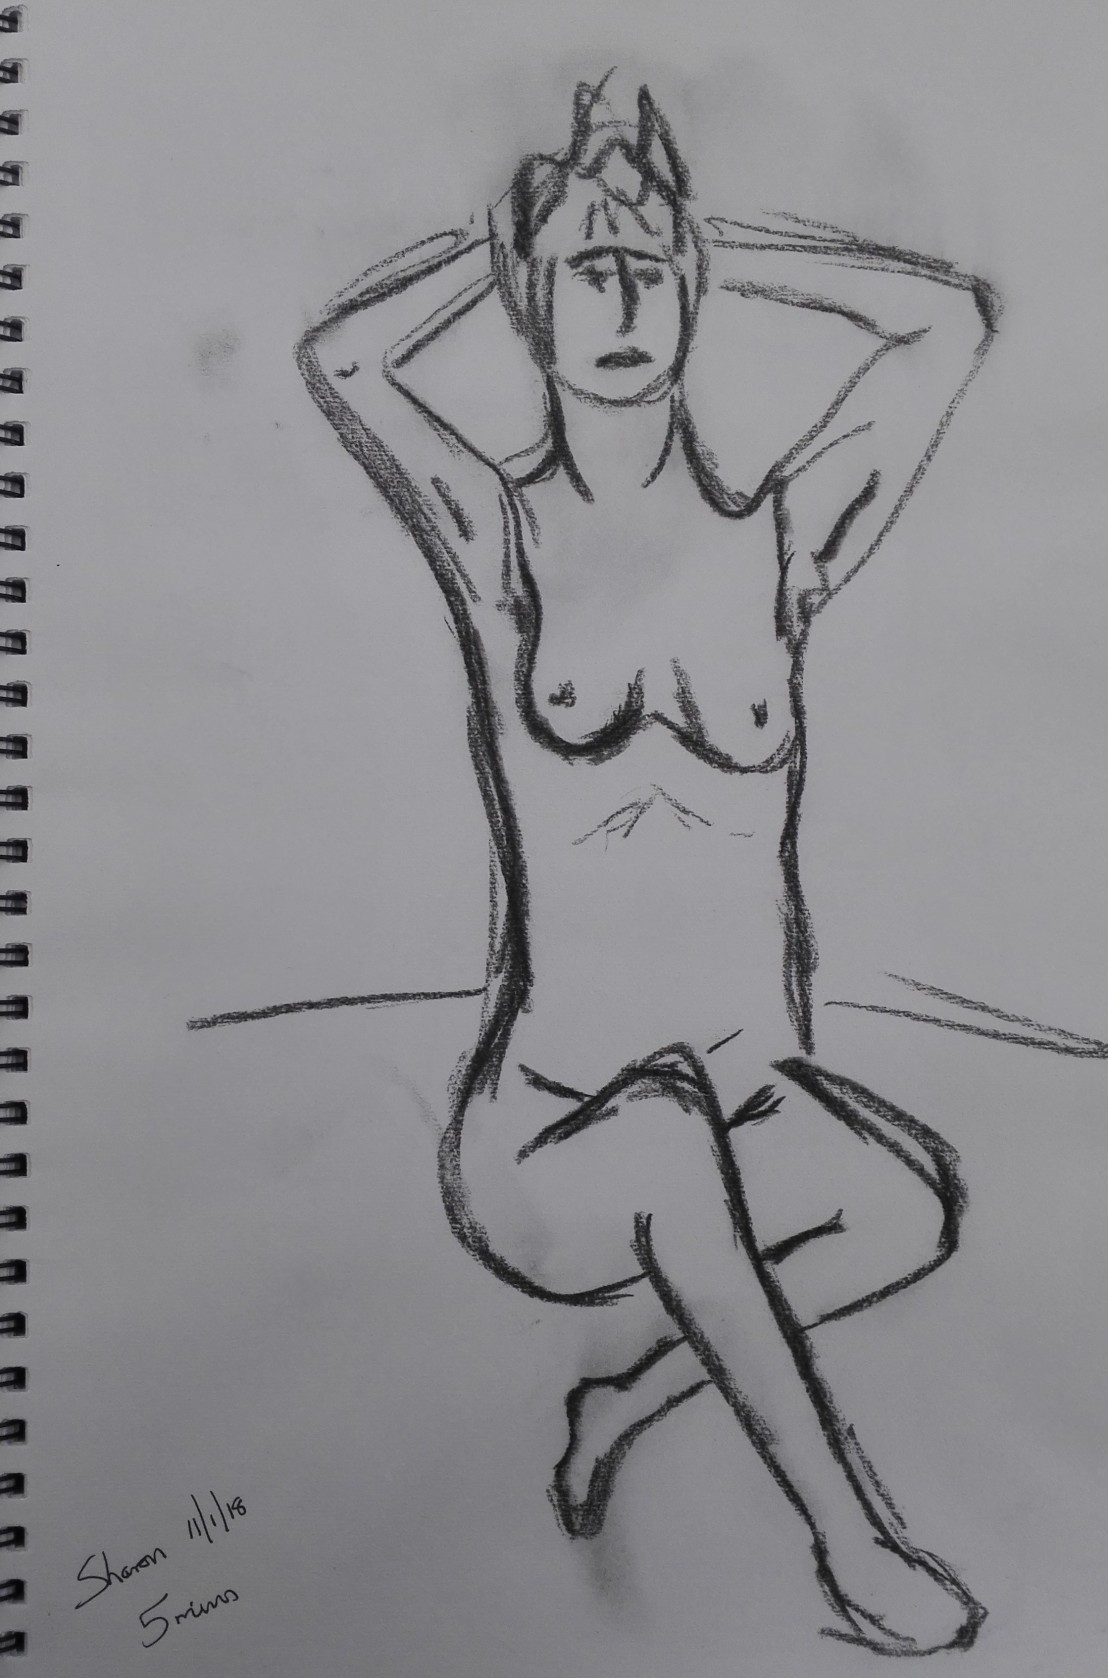
A couple of quick sketches, 3 and 4 minutes. I like how I captured these poses.

Life Drawing 3-5-18 Eva 1

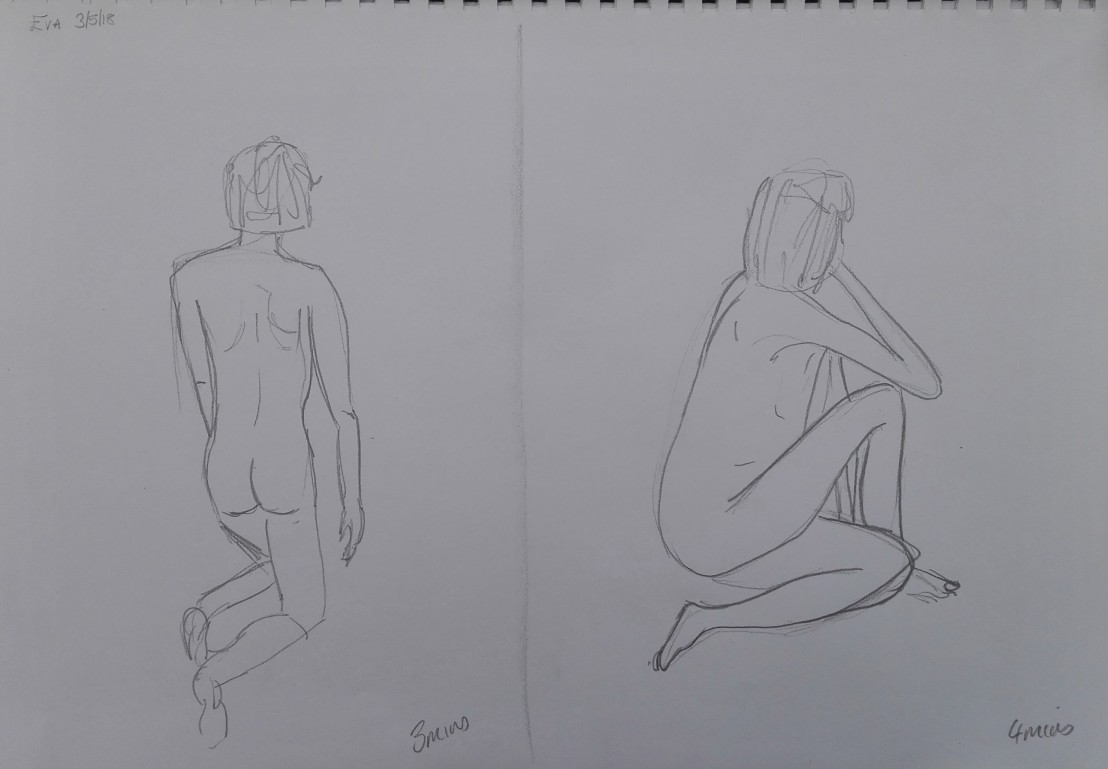
The right leg looks a bit odd but i like the arm leading to the hand on the head.

Life Drawing 3-5-18 Eva 2

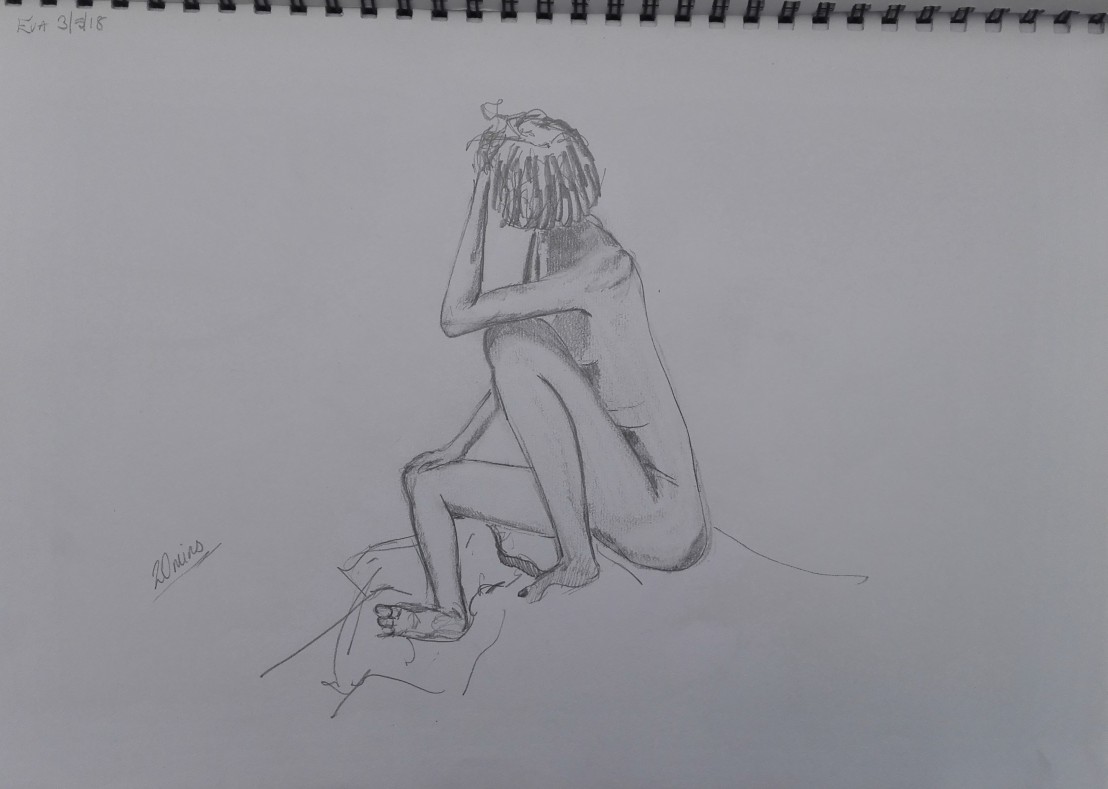
I concentrated a bit more on trying to get a better portrait in this sketch. This led to the problem with the models left leg which is wrong.
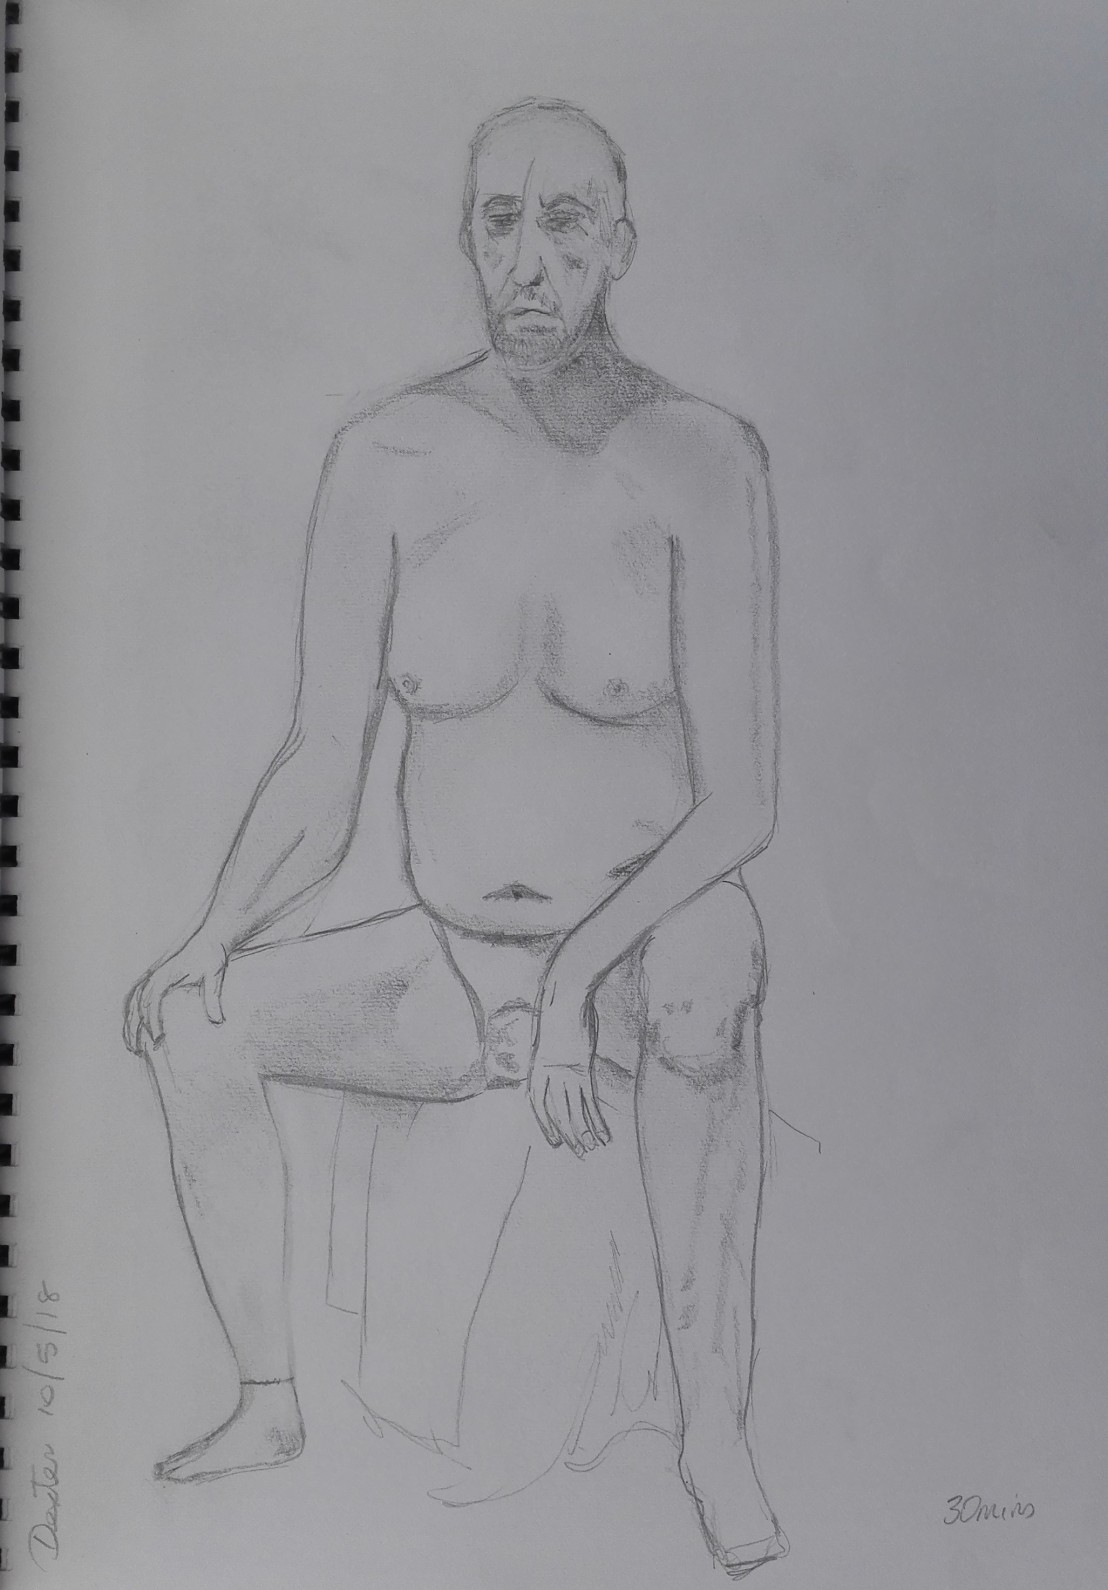
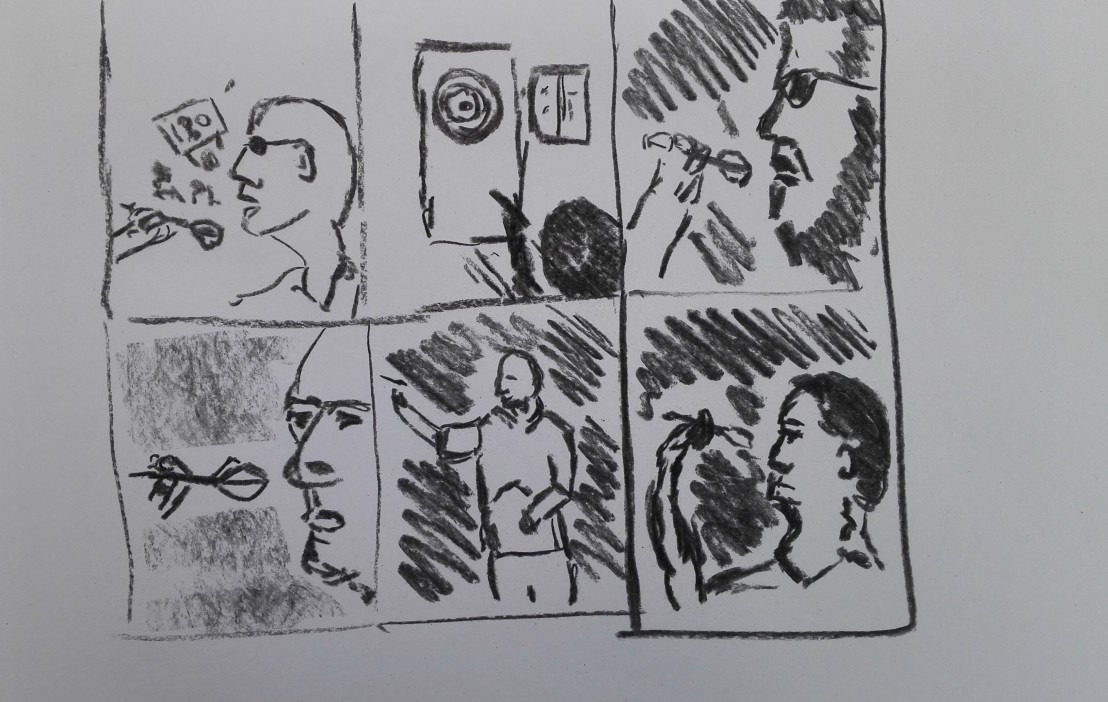
Life Drawing 3-5-18 Eva 4


Dexter 10/5/18

A quick sketch, 5 minutes, interesting pose. I feel the drawing has an element of Picasso in it.

Life Drawing 10-5-18 Dexter 1

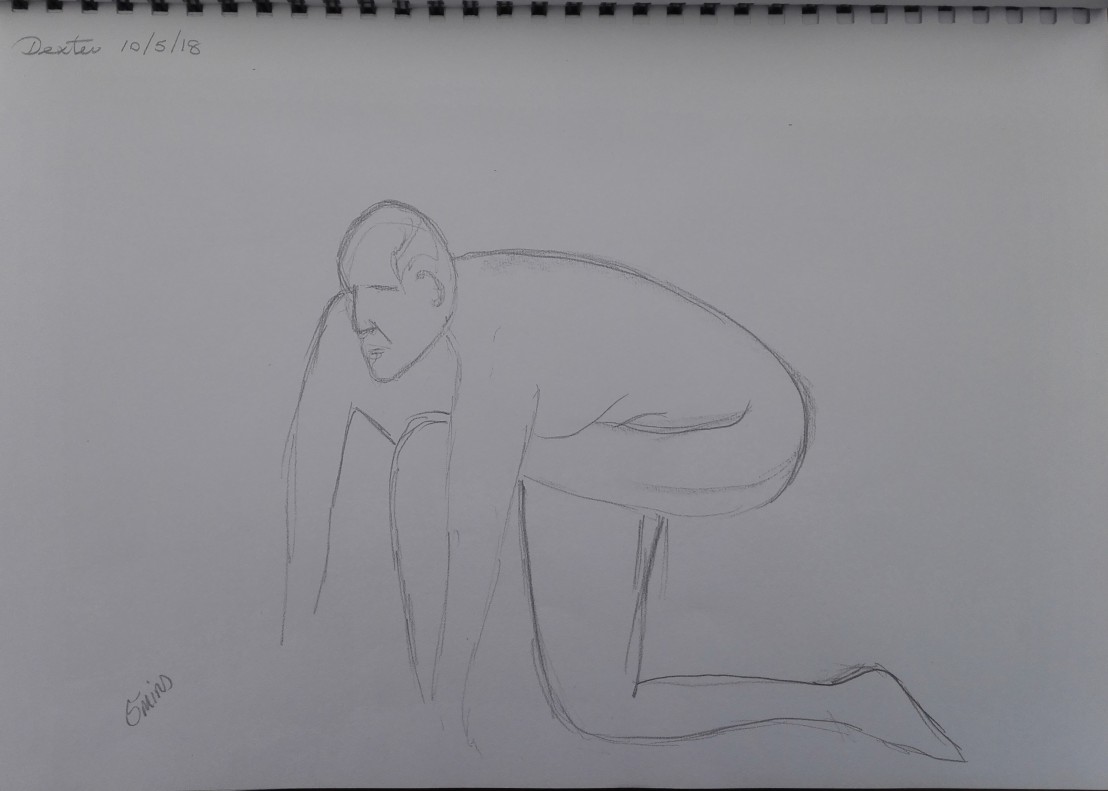
I have made Dexter look much older than he is but I feel that I captured the pose.

Life Drawing 10-5-18 Dexter 2

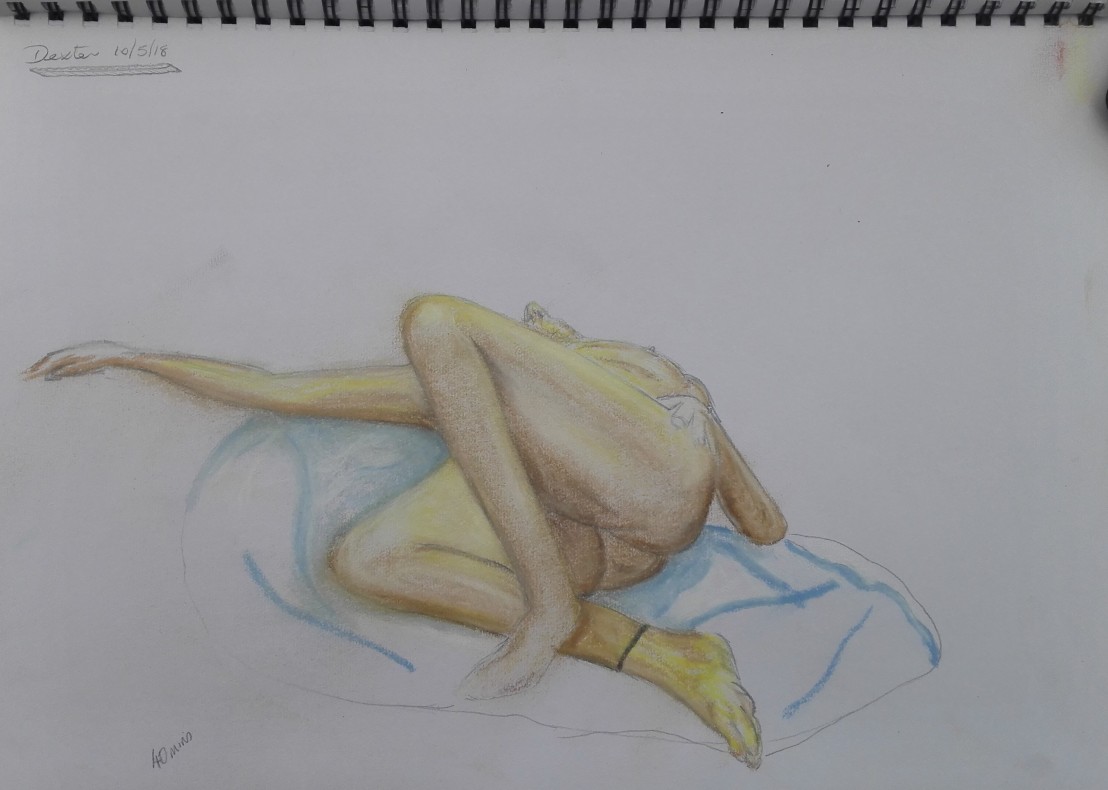
This was an interesting challenge. The pose meant that I could not see most of the model. I was confronted with a pair of legs and an outstretched arm. The addition of colour was my attempt to make the sketch more interesting and to bring out some tonal qualities.

Life Drawing 10-5-18 Dexter 3

Overall I feel that I am slowly improving my observational skills and the resultant sketches are becoming more confident. If I look back at the drawings I made last year I can see progress. I also remember the trepidation that I initially felt, this is no longer the case. I will certainly continue to attend these life drawing sessions.

Ely Life Drawing Group

As a last post for this part of the course I thought that I would add a few drawings that I have made since the start of the year at the Ely Life drawing group. I have been a member of the group since joining in January 2017 and will continue to enjoy these sessions for the foreseeable future.

The group meets at the Babylon Gallery in Ely on Thursday evenings. The sessions are normally attended by between 8 – 12 artists. Currently we have three regular models, Sharon, Eva and Brian who rota alternatively over the weeks. The sessions are split into a number of poses which are for 1,2,3,4,5 minutes then two 20-25 minutes poses and after a break for coffee a 40-45 minute pose.

I normally find that the 1 to 4 minute poses act as a warm up and can usually only get a suggestion or outline of the pose. The five minute pose often results in a presentable sketch but light on tone. The two 20 – 25 minute poses and the longer pose give more opportunity to explore both tonal qualities and also to concentrate on the face.

The drawings below are in chronological order, the timing of the poses can be seen on the drawing.

SHARON 11/1/18

IMG_20180129_114747IMG_20180129_114812


BRIAN 18/1/18

IMG_20180129_114828IMG_20180129_114852IMG_20180129_114907

EVA 25/1/18

IMG_20180129_114923IMG_20180129_114952

Part Three – Project ‘People in context’ – Exercise – Telling a story

I had some ideas for this exercise but didn’t have any model to help me to carry it out. What I wanted to try and portray was the view of a dart match or dart player in action. I meet some friends most Tuesday evenings for a few games of darts so I had some ideas that I wanted to try. Without having a model to pose for me I turned to google images to try to find what I was looking for. What I found when searching for dart players was a number of the famous players pictures taken from the same angle. There seemed to be little variation in the pose or action shot. There were a few which zoomed in a little on the face which I found slightly more interesting but none that showed the player from behind.

I made some sketches of the familiar poses but none of these was what I wanted.

Exercise, Telling a story - Sketches

I noticed that there was a silhouette outline of a generic dart player viewed from the rear which was closer to the composition that I had in mind.

Exercise, Telling a story - Photograph 1


I imagined that I could possibly use this pose and build up a scene to portray the composition I wanted. I tried a further two sketches.


These both seemed uninspiring and it wasn’t what I was looking for. Yes it did fulfil the brief but I had too much to imagine and felt that I would end up with a poor result.

A further search of Google images revealed the image that I was looking for.

Exercise, Telling a story - Photograph 2
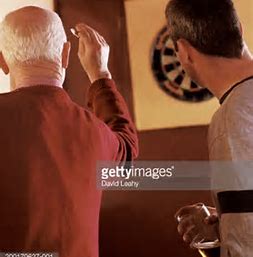
I could take the main elements of this photograph and try to complete a painting in which it would be clear what was happening, the figures whilst being generic would be part of a coherent scene. I set about painting, for once working not setting up a ground and working directly onto paper. I pencilled in the main outlines and shapes and them started painting. I reached a point whereby I considered that painting to be complete and took a photograph of it and then stood back for several minutes to look more closely at what I had produced.

Exercise, Telling a story - WIP 2

I was happy with the foreground but thought that the background, the dartboard and the surrounding area looked flat as it was devoid of shadows. These I added and again stood back to consider the painting. There were some other possibilities to add further light, say the effects of a spotlight illuminating the wall surrounding the board, but I decided against making any further adjustments. The finished painting is below.

Exercise, Telling a story - WIP final

Part Three – Project ‘People in context’ – Exercise “A figure in an interior”

For this exercise I was not able to use a live model and didn’t have time to take any pictures of poses that I could use. Therefore I turned to the internet and perused loads of images until I found one which I thought met the brief and that I felt comfortable with attempting to paint. The image I found reminded me of some of the Edward Hopper paintings I had been looking at as part of Research point 3. I will write a bit more on these paintings in a separate blog for Research point 3. In the meantime the three paintings are shown below.

The photograph that I decided to use for this exercise shows a woman reclining on a sofa in a hotel room. There are a lot of similarities between it and the Hopper paintings above.

Exercise, A figure in an interior - Photograph

I started by making a couple of sketches to try out the composition and also to try out getting the posture of the woman correct.


I decided to work on a silver ground. I’m not sure why I purchased this colour, I believe that I thought it was grey and only later discovered that it was silver. However it has proved to be useful as it has a reflective quality that captures light well. I made an initial sketch on the ground paying particular attention to getting the perspective of the couch correct. Having done this I worked up the painting by starting on the couch and the back ground before moving onto the woman. I didn’t take any photographs of the work in progress so it is straight to the finished painting.

Exercise, a figure in an interior - Final 2

I feel that I have captured the pose and that the woman looks to be located both on the sofa and in the space. Her face looks a little elongated but is still believable. I’m happy  with the way that I have captured the light and shadows and also the suggested landscape outside the window.

Part Three ‘Looking at faces’ Review of portraits completed during this part of the course

I have completed four portraits for this part of the course, all of which I have shown below, in exercise order. On reflection I feel that I have explored some different ways of looking at portraiture but also have not strayed to far. The most expressive work is the third portrait. In terms of painting style it is the most relaxed and personally I feel it benefits from this approach. For the first two exercises I was mainly concerned with creating a likeness and this forced me to focus on this at the expense of  expression. However when I compare these paintings with previous portraits that I completed during Drawing 1 and before embarking on the course I can see definite improvement. This is encouraging and I feel that there is plenty of room for me to further improve. I look forward to doing so and hope that the work in the next part of the course and Assignment Three I can prove this to myself.

Part Three – Project ‘Looking at faces’ – Exercise “Conveying character”

I chose to work from a photograph for this exercise. I took a number of pictures of my wife and chose one of these to work from. I wanted to create an unusual expression that had some likeness to the sitter but not necessarily a portrait. The picture and pose that I worked from is below. I blocked out the background by using Windows 10 photo editing facilities.

Exercise, Conveying character - PhotoI didn’t make any preparatory sketches but worked directly onto a ground of Prussian blue. First making a pencil sketch and then painting in the outlines to get the position and proportions of the main features.

Exercise, Conveying character - Sketch

Exercise, Conveying character - WIP 1

I decided to work in blue only for this painting using Prussian blue, Pale blue and black to darken the Prussian blue. For some reason I didn’t take any pictures as I worked on this painting which was completed in about two hours. I think the finished painting has character. Unfortunately my wife doesn’t feel that it is flattering, it isn’t, but it does have an element of humour. The facial expressions are slightly exaggerated but look convincing. I did notice that the angle of the head in the painting differs from the photograph. This is something that I have noticed before and I think it might be because I tend to work with the painting flat on the table in front of me. This has the effect of changing my perspective i.e. looking up the painting. I will have to try working on an easel.

The completed painting is below.

Exercise, Conveying character - Final

Part Three – Project Looking at faces – Exercise, Creating Mood and atmosphere

My aim for this exercise is to try to create a self portrait in which I look happy and cheerful. This is not my default look. To help create this illusion I will try to paint in a Fauvian style with bright, clean, colours.


This is the initial sketch on a bright yellow ground. I haven’t caught the smile yet. Hopefully when I paint it I can accentuate the joy.

IMG_20180104_152704

Well I have now completed the painting. I tried to keep the painting fairly loose and to mix the colours on the paper in preference to mixing them on the palette. Below are some of the steps as the work progressed.

I tried to make small adjustments to the eyes as at this point they seem to be crossed.

Hopefully the small adjustments and the addition of background has eliminated this issue. The completed painting is below. I think I have managed to capture a mood, or perhaps an expression, surprise! Additionally I have managed to capture a likeness. I’m not sure whether the blue hair and beard work. It may have been better to have painted this in orange and browns but this would have been less interesting.


Exercise, Creating mood & atmosphere - WIP 8

The reaction of my wife when she first saw this painting was to breakdown into fits of hysterics. I don’t know whether this was because she had not seen this expression on my face before.

Part Three – Project – Looking at faces – Exercise – Head and shoulder portrait

I started this exercise by making a couple of quick sketches of my wife whilst crocheting. The two sketches were not flattering. However that was not the aim of them. I was more interested in getting a good composition for this exercise. The two sketches are shown below, it is the second one that I decided I would use.

I also took two photographs of the pose and used the second one as the basis for the portrait.

I made a decision to work on a dark green ground. I wasn’t sure how well this would work as the colour didn’t look dark enough the make the tones, particularly the subtle skin tones stand out. One of the advantages of the pose I had chosen was that the sitter was looking downwards and concentrating on her task. This had the effect of lowering her eyelids and obscuring the eyes. However this also gave a challenge in how to make the pose look authentic.

I marked out the shape of the head and the main features in charcoal. This sketch seemed to capture the pose and the proportions of the face looked reasonably correct.

Exercise, Head & shoulder portrait - WIP 1


I removed most of the charcoal and painted the outline of the face in Naples yellow and the worked upon the shoulder, the jacket and followed this by working up the main features and colours and tones on the face.

Exercise, Head & shoulder portrait - WIP 1b 
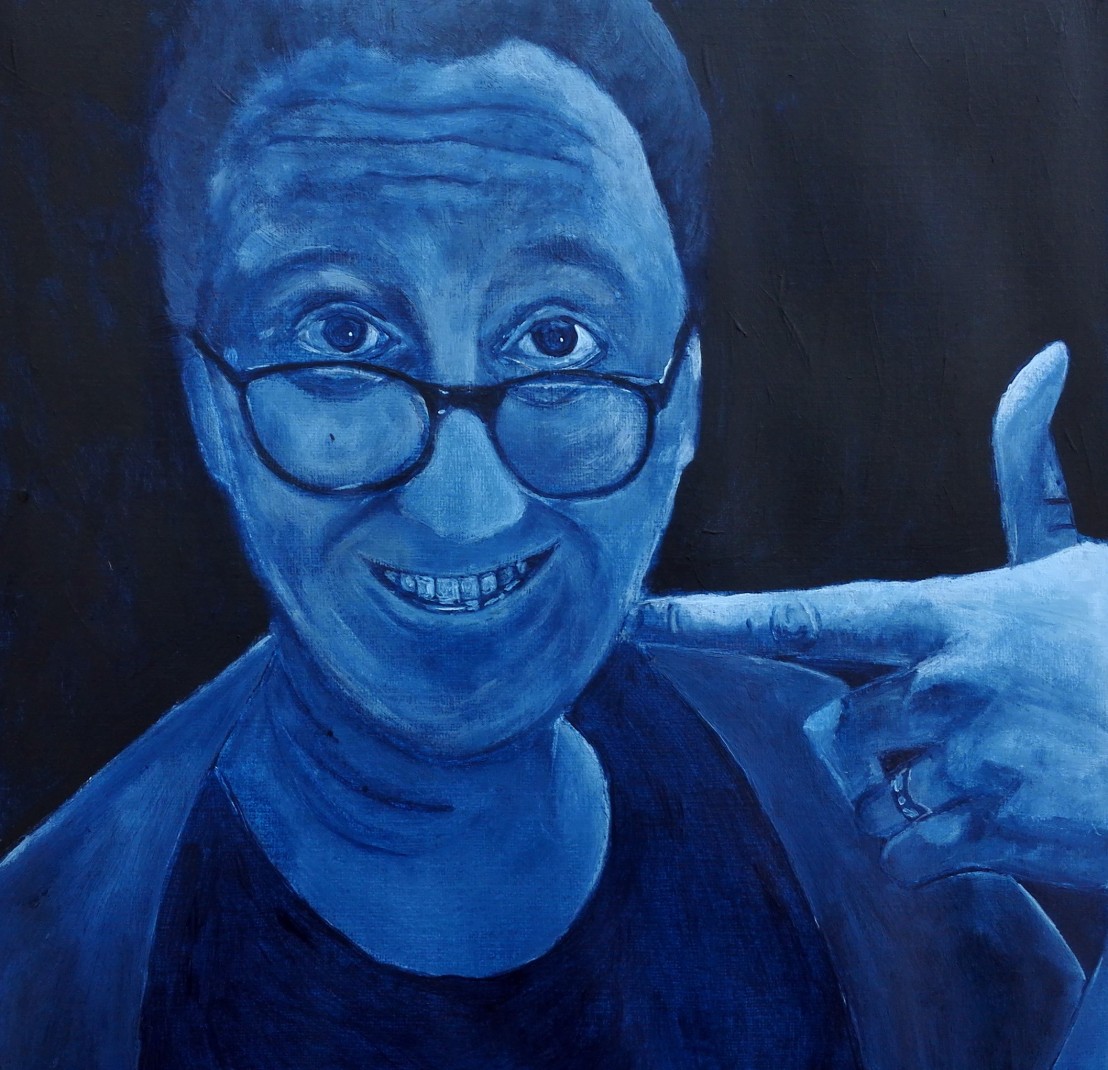
I omitted to take enough photographs of the work as it progressed. I stopped at this point below and left the work overnight.

Exercise, Head & shoulder portrait - WIP 2

Returning in the morning I noted some areas where the colour and tones looked a bit weak and also there were some lines and contrasts that I didn’t feel were right. I worked over these areas until I felt that I had got to a point where I was in danger of overworking the painting and perhaps losing the likeness.

The finished portrait is shown below. I feel that it captures a likeness. There are some areas where I feel that the colours look a bit tame and pale. There is perhaps a lack of tonal quality and the original pose could have been better lit to give more contrast. I also struggled to get the expression of the lips correct. There is the hint of a smile in the pose which I have failed to capture.

Exercise, Head & shoulder portrait - Final 2


Part Three – Project – Looking at faces – Exercise “Self Portrait”

I have attempted some self portraits previously with varying degrees of success. What I wanted to achieve with this exercise was a self portrait that had some likeness to myself but also had a bit of character. Additionally I wanted to try to paint in an expressive way.

As a precursor to the painting I set about making some sketches to test out various angles and to get a feel for the subject, me.

I set up a mirror on my desktop easel and made three sketches in charcoal. One with the mirror to the right, one with it in front and one to the left. The third sketch is by far the best of the three. The proportions are better balanced, the shape of the head is about right and the eyes, whilst intense are correctly placed.

I followed this up with two further sketches. The first was a second attempt at the straight ahead view. This resulted in a better sketch but the shape of the head was too thin.

Exercise, Self Portrait - Sketch 4 I decided I would try a further sketch with the mirror to the left as this had produced the best sketch so far. I made another sketch this time using pencil which allowed me to get some more expressive lines into the drawing. This produced the most pleasing pf the sketches and this made up my mind to attempt a painting using a similar view.

Exercise, Self Portrait - Sketch 5

I decided to make paint on a dark ground and prepared an A3 size acrylic paper and made an initial rough sketch in pencil to map out the proportions.

Exercise, Self Portrait - WIP 1

I also took a couple of photographs for reference but ended up not using these at all.

Exercise, Self Portrait - Photo 1Exercise, Self Portrait - Photo 2

Having completed the sketch I proceeded to paint using a restricted palette of black, titanium white, Naples yellow, burnt umber (the ground colour), pale pink and pale blue.

I took a couple of pictures of the work in progress.

As usual the big decision was when to say stop. I got to a good point and decided to leave the painting overnight a review it the following day with fresh eyes. Having done this I made a few adjustments before deciding that I had achieved my aim for the painting.

Exercise, Self Portrait - Final 1

The painting shows a rather intense looking me, I suspect that this is due to the fact that I am concentrating whilst painting. Overall I feel that I have captured something of myself. I tried to keep the painting fairly loose, however it wasn’t as loose as I wanted. Additionally I was trying to capture the light. I had set up a table lamp to the right of me. I think I have expressed this on the right side of my face and beard. By the way my beard is not as full or as luxuriant as depicted in my painting. This either artistic licence or seeing what I wanted to see!

I took a further photograph of this painting in a different light and noticed that it gives a different feel.

Exercise, Self Portrait - Final 2

Part Three – Observing the human figure -Exercise “Tonal figure study”

For this exercise I had to use a drawing that I made at the Ely Life Drawing Group. I had tried with one of my drawings from the last session to add tonal information to the drawing so that I could use this for this exercise. The drawing I decided to use is shown below.

Life Drawing Group 30-11-17 Sharon 20 minutes

The lighting for this pose was above the model but slightly behind and to the right so that it threw a shadow over her shoulder and cast further shadows across her stomach and right thigh.

I started the painting by making a rough pencil  sketch.IMG_20171206_143309
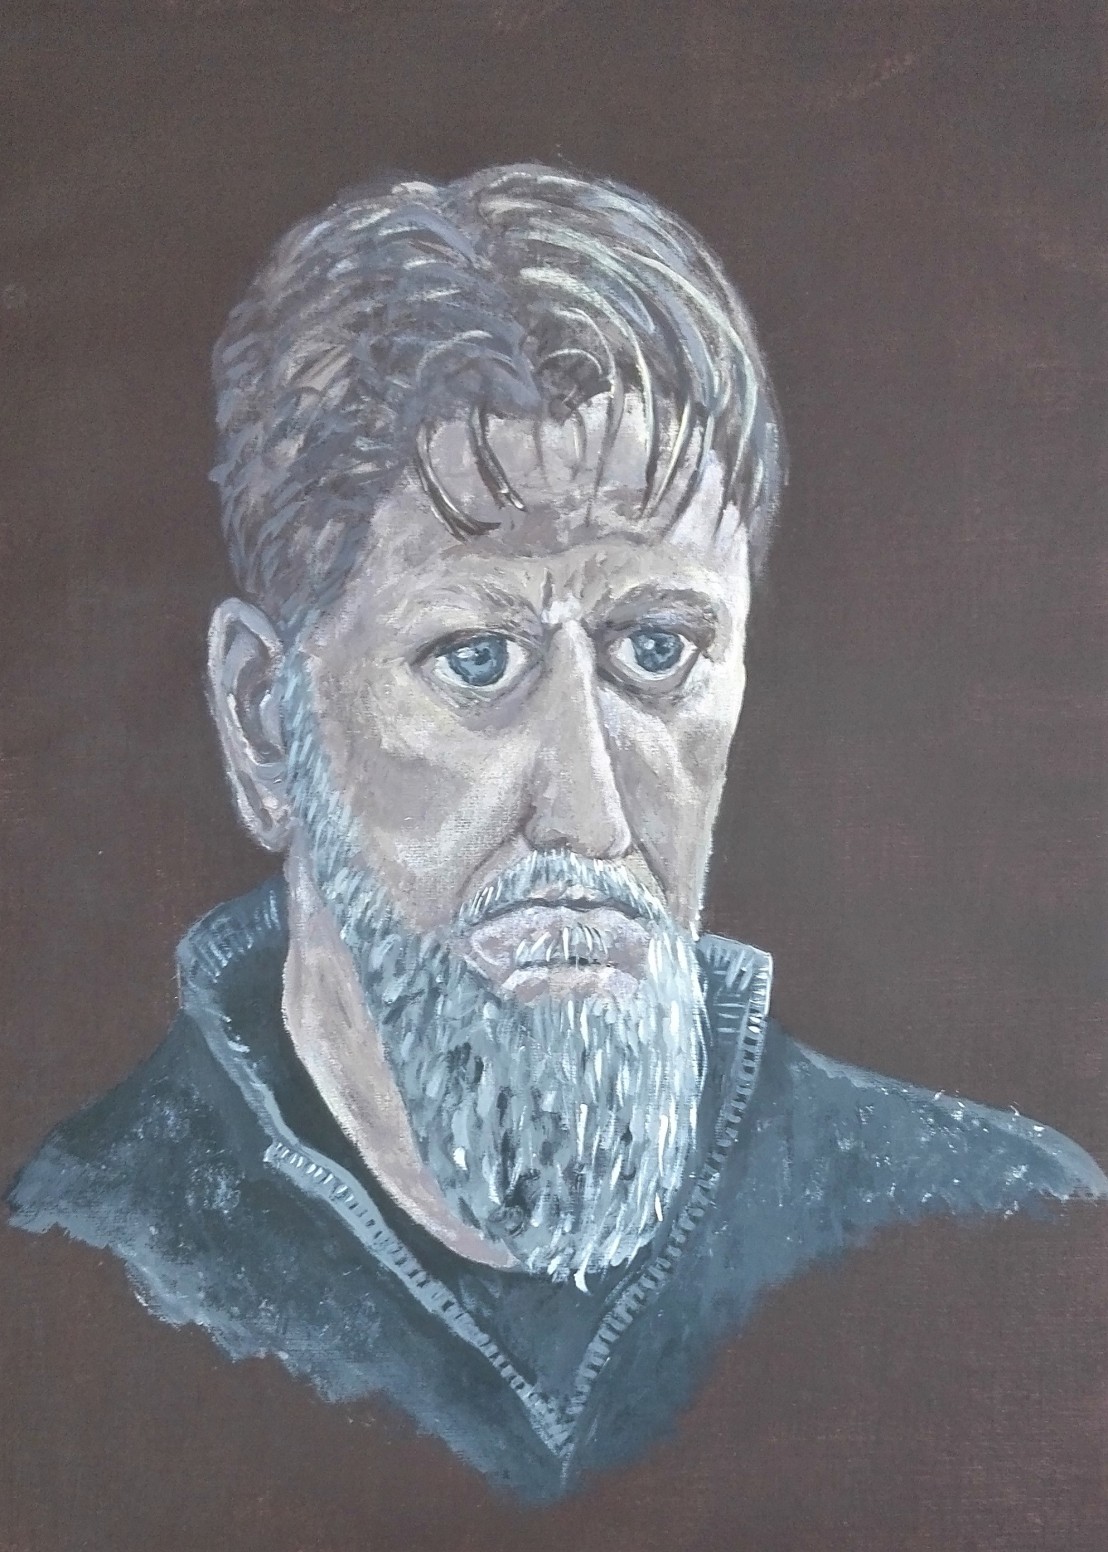
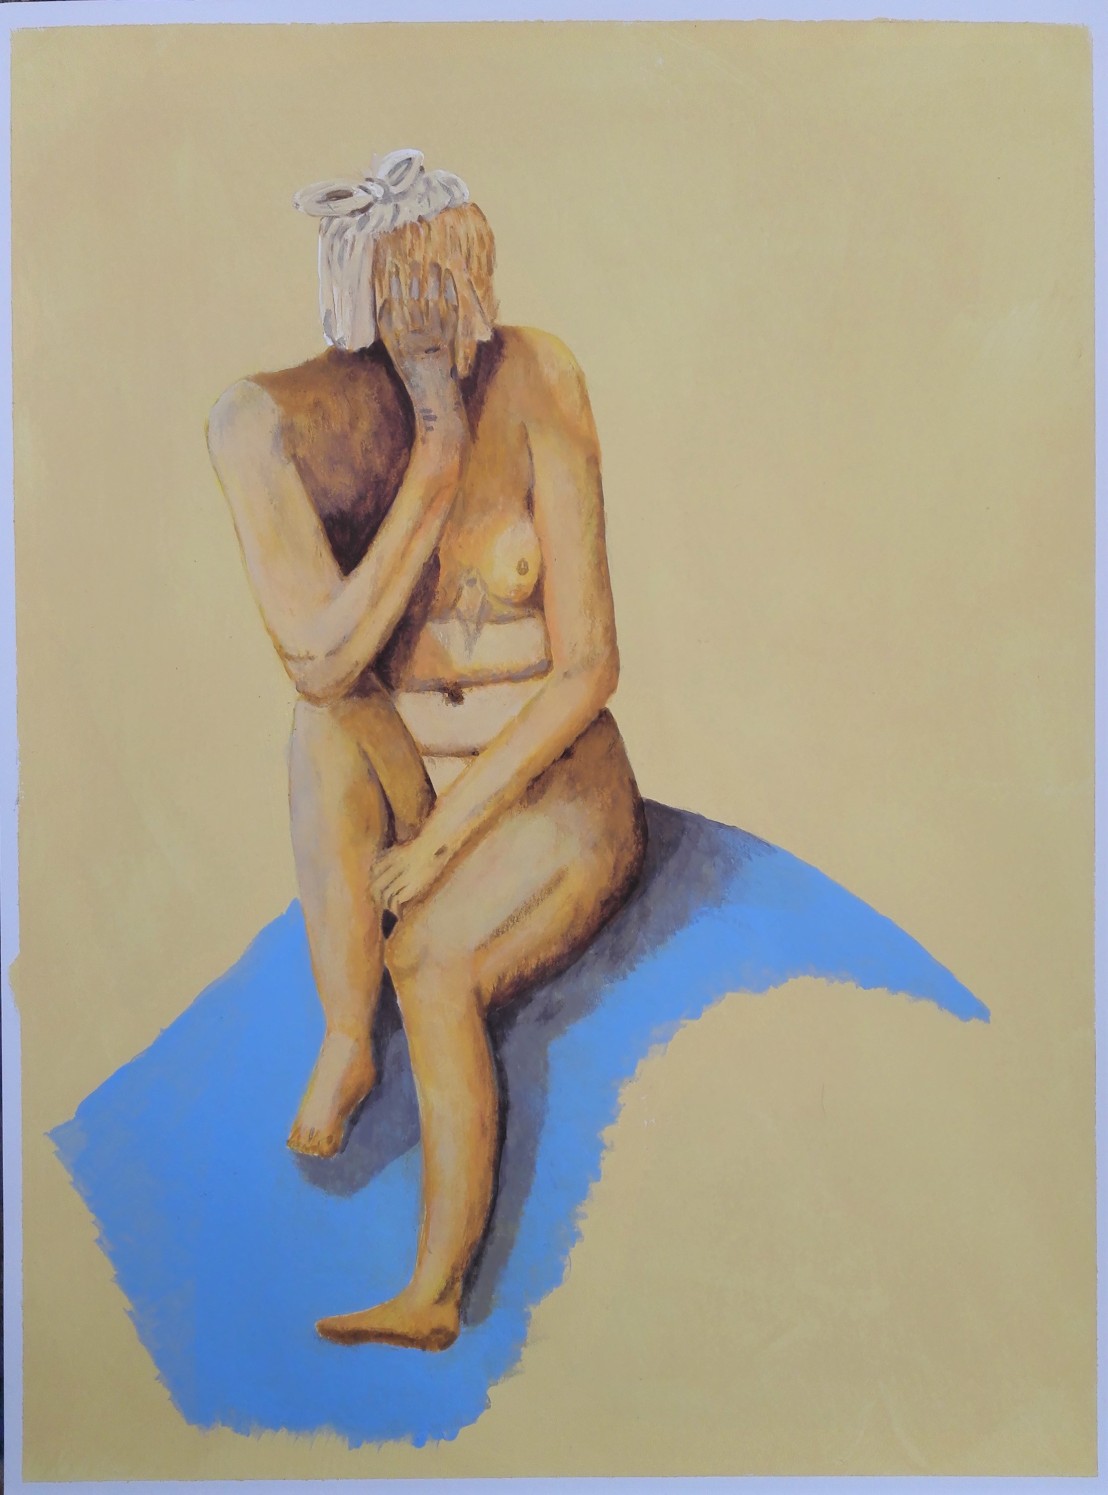
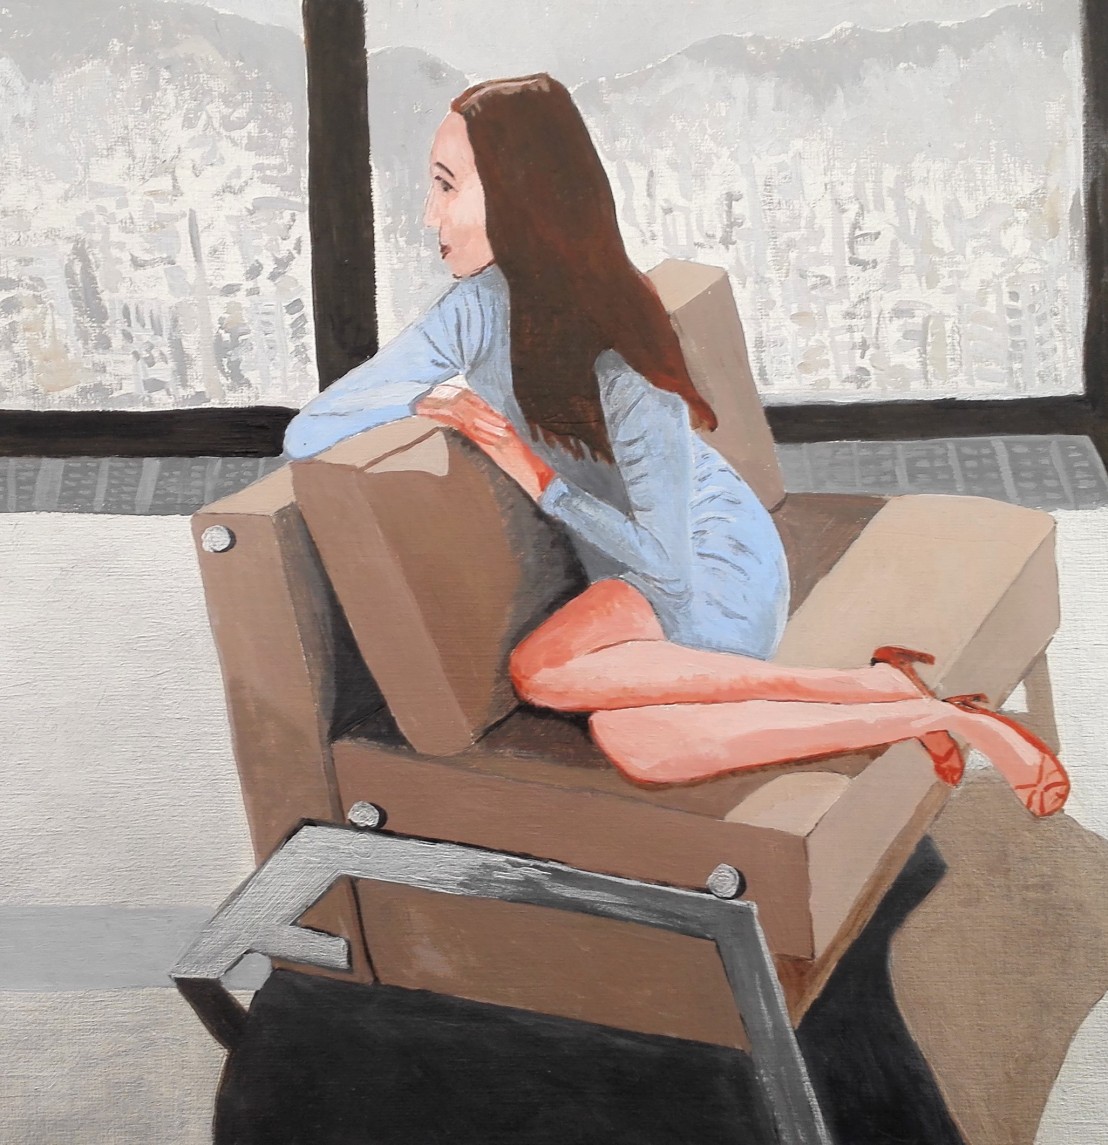
This was followed by adding a Naples yellow ground. This colour is fairly transparent so that I could still see the sketch. The photograph below doesn’t pick up the colour too well.

IMG_20171206_144640I then proceeded to try to add the tonal information by referencing the drawing.  I worked from light to dark initially and then tried to work from dark to light.  There was an increasing danger as I worked on this painting that I would overwork it. I think this was partly due to not having enough information to work from.  Therefore this made my use guesswork and imagination to build up the tones. I stopped work at the point below and posted the painting up on the conservatory window.

IMG_20171208_120123
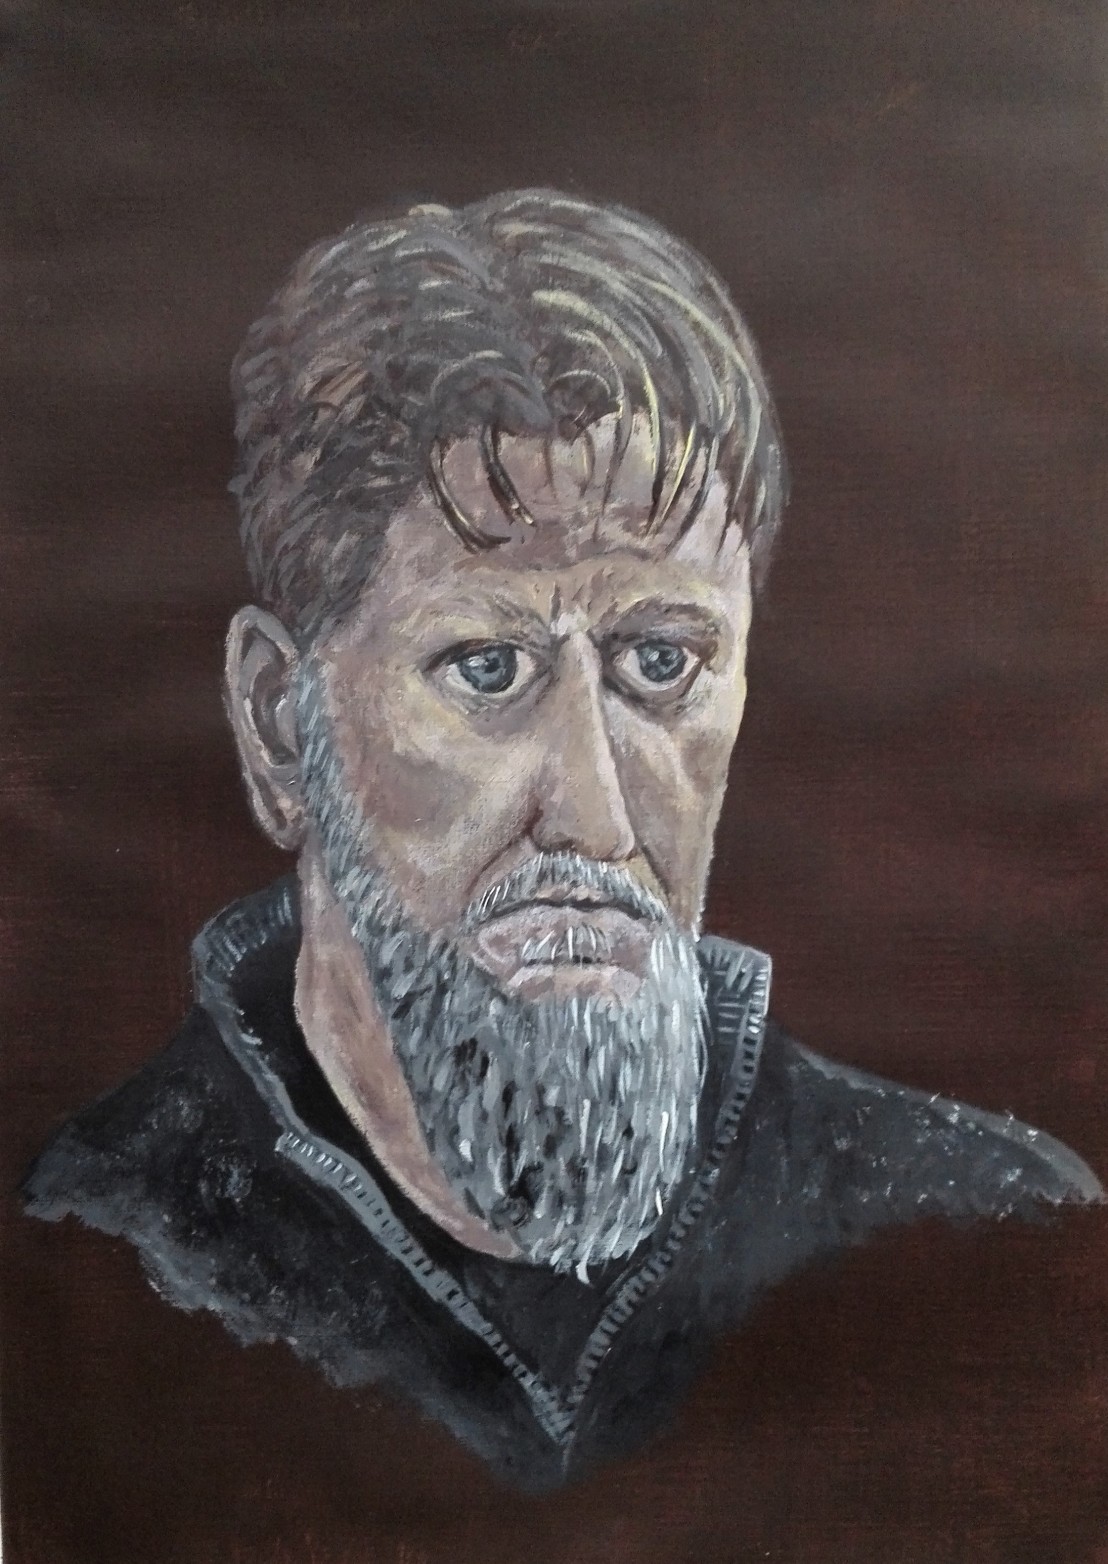
When looking at the painting the following day I thought that the darker tones were too weak and decided to add further dark tones to improve the contrasts. Again I was struck that the drawing didn’t give me enough information. an option could be to ask if it is possible to take a photograph of the model whilst posing. This I will request at the next session in 2018. After adding further darker tones I decided to stop working on the painting and therefore the finish the work. The final painting is below.

IMG_20171211_113237

As an exercise in tonal painting it has some successes. However overall as a painting it has flaws. I’m not happy with the hand supporting the head it seems to be too large and lacks detail. I am also not entirely happy with the right leg which is perhaps too short and not the right shape.